Category Archives: meat rabbits

On Breeding Like Rabbits

When people say someone/something is, “breeding like rabbits” the implication is that they are reproducing at an unbelieveable rate.  As someone trying to raise rabbits for meat, I can tell you that it isn’t nearly as easy as it sounds.

Our breeding stock, Fiona and Nibbler have been old enough to breed since January 2011.  However, January in Northern Michigan can be pretty harsh and I wasn’t ready to start my breeding endeavor then only to have it result in frozen litters of baby bunnies.  I waited until March.  The air had warmed sufficiently and I deemed it safe to start.  I took Fiona to Nibbler’s pen just like the books/internet said I should.  I left her there for a while, checked back and returned her to her cage.  A few hours later I let her visit again, left them alone for a bit and then put her back in her cage.  I documented the date, marked the calendar and started counting down the days until she would need a nesting box.  I Googled different types of nesting boxes.  I waited.  And waited.  And waited.  A week after the due date I gave up waiting.

I tried again.  No luck.

I tried again.  I decided that once again the pregnancy hadn’t taken. In June I asked my friend Joan from Olds’ Farm if I could bring my doe out and put her with one of the bucks they keep.  Joan agreed and I planned to take Fiona to the farm next time I went.

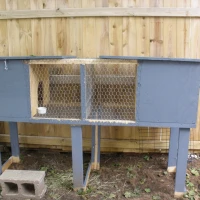
Imagine my surprise when I awoke the next morning to find Fiona pulling her fur out and spreading it around her hutch.  I needed to pick Dylan and some friends up from a sleepover and take them to a 10:00 movie. I didn’t have time to set up a real nest box before I got the boys so I put out a makeshift nest and went about my business.  I intended to come home and set up a real nest box before Fiona delivered her babies because rabbits are “supposed” to deliver at night.  Wrong.  I got home at noon to find my husband in the yard announcing the arrival of two kits.  Fiona didn’t like my makeshift box and had delivered them on the floor of the cage.  Mr. Hippie had moved them into my “nest box” with a towel because he didn’t know if he should touch them or not.  When everything was said and done, Fiona had delivered eleven kits.  One was stillborn but we moved the ten surviving kits into the “nest”.  After the horde of boys left, Mr. Hippie and I went out and got the rest of the things we needed to properly accomodate the babies.

I set up the deluxe nesting box and moved the kits into it.  Fiona decided that she would dig a new nest next to the one I made.  She started pulling more fur to line the new nest.  I started panicking, afraid that she was going to deliver another litter of kits.  (Rabbits do that, you know.)  Fiona did not deliver any more kits.  She did however divide her kits into two groups and move half into the new nest.

Once Fiona had completed her second nest, she promptly stopped nursing the front five kits.  Fortunately, rabbits are designed to survive harsh conditions.  Like, for example, your mother not coming back to feed you for a couple days because there is something dangerous lurking about your home.  I moved the five littler kits that she hadn’t been nursing into “her” nest with the five bigger kits.  The next morning I awoke to find two of the kits pushed out.  They weren’t just pushed out of the nest either.  They had somehow managed to be completely evicted from the hutch.  Both were chilly and crawling around on the ground.  I put them back into their nest so they could warm themselves and went on my way.

The next night I went to derby practice and left the kids home with Gwen in charge since Adam was working that night.  After practice I checked my phone and found that I had missed a call.  The kids know that they are only to call me in an emergency, so my heart stopped for a moment while I, without listening to the message, called the house.

Gwen was bawling on the other end of the line, “Mom, one of the rabbits died.” She was panicked, distressed, I’m not sure what else but I tried my best to talk her down.  She didn’t know what to do with the dead kit.  I suggested she add it to the compost heap like I had done with the stillborn kit. This solution was not acceptable to her. When I got home she had already provided funeral and burial services for the kit.

Fiona continued to push the other runty kit out of the nest for a while, but never split the nest again and begrudgingly nursed all the kits.

When all was said and done, we ended up raising nine kits from our very first litter!  It took a while for the rabbits to figure out what they were doing, but in the end it was a successful endeavor.

2 Comments

Filed under frugality, green living, meat rabbits

Goodbye, 2011

2011 was a difficult year both for my family and for this blog.  If you are/were a regular reader, you noticed I wasn’t around much. I hope to change that this year.  Because I didn’t write many posts last year, I wasn’t surprised that most of the top posts last year were older posts.

As a farewell to the year gone by I present:

The Top Five Posts of 2011

  1. Brined Pork Roast
  2. Homemade Fabric Softener
  3. Homemade Laundry Detergent
  4. Building A Rabbit Hutch
  5. Crusty Round Loaves of Homemade Bread

I am surprised that the Brined Pork Roast recipe was number one. Especially because in my opinion, this recipe is much tastier.

I get lots of searches for green cleaning recipes. Pinterest has been especially helpful in promoting them. I’m glad people are being greener and I’ll try to post some more green cleaning recipes this year.

I am excited to see the rabbit hutch plans make the list.  I wonder if that is because more people are interested in rabbits for meat, or if pet owners just need plans? Regardless, I hope to post more rabbit updates soon. Until then, if you’re looking for rabbit information, check out On Breeding Like Rabbits.

Happy New Year,

Angela

Leave a comment

Filed under Charcutepalooza, food, frugality, green cleaning, green living, meat rabbits, Miscellaneous

Building a Rabbit Hutch

When we brought Fiona home, we housed her in the same old guinea pig cage that we used to brood our chicks for a few days until we could get a hutch built, but we knew we had to build a hutch.  First of all, the guinea pig cage was designed as an indoor habitat and the bunnies will be living outdoors; the cage doesn’t offer any protection from the elements.  Second, the guinea pig cage has a solid bottom.  Rabbits need to have wire on the bottom of their cages to allow all the waste to fall through.  Rabbit waste is very corrosive and will eat through solid-bottomed containers.  Third, when housing multiple rabbits, it is best to keep them separated.  Bunnies are prone to chewing on one another.  This can cause injury and infection and destroys the rabbits’ coats.  Besides, you don’t want a buck and doe mating like, well, rabbits.   

So a rabbit hutch was necessary in short order.  I spent some time researching plans online before developing the plans for this hutch: 

housing for two rabbits

Home to our breeding pair.

Fiona lives in the left half and Nibbler resides in the right.  Once Fiona’s kindled a litter, the kits will stay with her for a few weeks before being separated into different quarters.  This hutch cost us all of $29.43 to build.  

If you need to build something small, I highly recommend that you check out the “cull lumber” bin at your local lumberyard or Big Orange Box Store.  You can typically find an assortment of bent or damaged merchandise for 85% off.  We got a sheet of 3/4″ plywood for $3.75.  REAL plywood, not OSB.  The sheet had been cut into three pieces but apparently was not the right size for the original purchaser.  We took the two larger pieces and left the six-inch strip behind. We also found two of the three 2x2s that we needed in the cull lumber bin for twenty cents each. The 2x4s we used for the legs of the hutch and the bracing inside the boxes were FREE.  They are untreated lumber that was used in/under inventory at the store.  It is important that you use untreated lumber because rabbits will gnaw/eat their cages and eating treated lumber is not a good idea.  The paint is “oops” paint from the Big Blue Box Store; Valspar’s top of the line exterior paint for $5.  The hook and eye latches we paid the full price for: 2/$1.49.  The biggest expense was the roll of 1/2″x 1″  rabbit cage wire which cost us $16.49.  Using the correct wire on the bottom is important for several reasons.  First because of the corrosive properties of rabbit urine.  Second, using thin wire can cause injury to your rabbits’ feet.  Third, holes that are too large allow predators easy access to your rabbits.  We had some hinges and chicken wire leftover from our chicken coop/tractor construction, so we didn’t need to buy cage wire for the front or back of the hutch.  Using leftover chicken wire saved us another $12 or more dollars on wire.  Hinges probably would have been another $6-10.  We also had a supply of screws, nails and staple gun staples in the garage.  Fasteners can add up quickly if you have to buy small boxes for every little project you complete. 

I may attempt to draw real plans for you in the future, but for now, here are the dimensions of the hutch: 

  • 2 wooden front panels: 20″ w x 20″ h
  • 2 wooden back panels:  20″ w x 18″ h
  • 4 side panels (two inside & 2 outside): 23″ w x 20″ h (The sides are sloped with a 20″ height at the front dropping to an 18″ height in the back.)
  • 2x2s were used for framing the base.  The distance across the front of the entire hutch is about 74″.  If I were to do anything differently, it would be to make the hutch a little longer so that the bunnies have more space to move around, but they have about six square feet each.

Because we used a precut sheet of plywood, we had to try to get the most efficient use of the board the way it was already cut.  We also had to supplement with a small sheet of plywood left over from a project we finished years ago.  Clicking here will give you a scale cutting guide to use if you have a full sheet of plywood.  The fronts and backs need to go over the ends of the sides to make the roofs fit.  It also makes your hutch look nicer from the front with no seams showing.  The size of the boxes is adequate but as I mentioned, you might want to make the “run” portion of each hutch a little bigger.  Raising Rabbits by Ann Kanable recommends seven to eight foot per rabbit, so another foot in each run would give you about eight feet. 

If my directions seem confusing, please leave a comment and I will try to clarify for you.  I am neither an engineer nor a construction worker.  I tell my husband what I want and figure out how big to make the pieces and he figures out how to construct it for me.

10 Comments

Filed under meat rabbits

Nibbler

Last week I introduced you to our new doe rabbit, Fiona, and told you about my hare-brained scheme (Yeah, I really just said that.) to start raising meat rabbits.  I can’t raise cattle in town.  At present, I can’t even have a goat, but I can have rabbits because they can be raised in small, urban spaces and are considered pets by most people.  

I can, and will continue to buy sustainably raised meat products from farmers I know and trust, but raising my own meat rabbits is financially a better option for me.    Besides, rabbits are greener; they are very efficient converters of plant biomass into meat.  If you don’t believe me, read this research paper by Wayne Cook from the Warner College of Natural Resources of Colorado State University.  It’s really long and unless you’re versed in the science, probably difficult to read so I’ll just share this statement:

“Calculations for comparisons among herbivores show that rabbits can utilize the herbage biomass potential better than sheep or cattle and sheep are considered more efficient than cattle.  (The data) shows that rabbits are about 2.2 times more efficient than sheep and about 2.8 times more efficient than cattle.”

So, even though I don’t have space for sheep or cattle, I can cleanly, humanely and efficiently produce my own meat.  Rabbit meat production doesn’t require much space or equipment and the start-up costs are minimal.  I’ve done my research.  I know there are breeds of rabbits more suited to meat production based on their size, body shapes and growth patterns.  Fiona, our doe, is a Palomino rabbit.  Palominos are considered a good breed for meat production.

Young buck rabbit.

Our new buck.

This is Nibbler.  Nibbler is a 9-week old buck that we purchased at the fair last Wednesday and picked up yesterday.  The kids selected him.  I like that he looks like a wild rabbit.  My only criteria for rabbit selection other than suitability for meat production was that we couldn’t have any of those zombie-eyed albino rabbits.  I’ll be honest, they creep me out. 

Nibbler is a mutt, but he is a blend of several varieties of rabbits that are of a good size and shape for meat production.  Not all the breeds in his gene-pool were on the “preferred” list for meat production, but most of them were and his parents were of a good size (9-11 pounds).  I’m not raising pet rabbits, so I don’t need pedigrees.  By diversifying my gene pool, I will actually end up with heartier stock not prone to genetic defects common in straight-breed rabbits.

When we started with chickens I didn’t keep excellent records of our costs because saving money on eggs wasn’t my goal.  However, I want to show that rabbits are affordable, sustainable meat that anyone inclined to could raise.  We won’t have any meat from our pair for a while because they are young, but I will keep you updated on the expenses as we move forward in this venture.  Check back soon for a post about rabbit housing!

6 Comments

Filed under food, frugality, green living, meat rabbits