Tag Archives: recipe

Egg-less Banana Bread

First, if you’ve never been to this blog before, let me make one thing perfectly clear. I am not a vegan or a vegetarian. I eat eggs. I raise chickens just so that I can have good, quality eggs at my disposal. However, we’re smack in the middle of winter. Even worse, we’re smack in the middle of some awful polar vortex that made its way here from the Arctic and won’t leave. If you’re not familiar with chickens, you probably don’t know that when the daylight starts to wane, so does their egg production. Add to that the fact the we’re down to three hens and Luna’s production has slowed anyway as she reaches her fourth spring. We haven’t had an egg here since October!!
So, I’ve been forced to go to the co-op or farmers’ market to keep eggs in the house. Which is fine, but um, we’re trying not to spend all our money on groceries and egg and sausage biscuit sandwiches are on this week’s dinner menu and I didn’t want to use them all up and have to buy more.

My pig!So, the bunch of bananas getting browner by the day was screaming at me. I could have peeled the bananas and put them into one of the freezers, but I’m trying to empty them enough to make space for the hog we’re getting from Quartz Farm as soon as he’s big enough.

Banana bread is the best way I know to use up sad, old bananas. All my recipes called for eggs. I Googled egg-less banana bread and got 2 or 3 different recipes that were all basically the same. I then searched for egg substitutes. My search returned the usual, “applesauce, banana, flax seed or oil”.

I ran through the options in my mind and decided against all of them because: I’m already putting 6 bananas in the recipe, I don’t think I should substitute one for the eggs; banana bread already has a lot of butter or oil, so I didn’t want to add any more; all my applesauce is flavored and I don’t want to add any more fruit to my bread; and finally, I don’t have any flax seed. But, there was another egg substitute that intrigued me, for each egg, mix:

2 tablespoons water
1 teaspoon oil
2 teaspoons baking powder

I have oil, water and baking powder in my house, so I decided to give it a go.

Banana bread recipes are essentially the same. Oh, of course you can add chocolate chips, or sprinkle some sort of topping on your loaves  but they all boil down to the same thing. Bananas, flour, sugar and a few other key  ingredients in similar proportions across the board. Well, except for that whole egg thing.

Have I mentioned that I’m a math geek? Sometimes when I can’t decide on which recipe to use, I like to play the game of averages. Do you remember averages from school? Or maybe, like me, you actually still use them in your adult life? Add up the values of a given thing and then divide by the number of given things you started with. It’s pretty easy actually, but the nerd in me loves it.

(If you’re screaming in your head, “Just get to the recipe already!” Click here for a printable version or scroll down to the pictures and please accept my apology for rambling.)

I start with a table. I list all the ingredients down the side and then across the rows I write in the volume of that ingredient in the various recipes. Once the table is complete, I calculate the average amount of each ingredient, round it to the nearest measurable amount and then use that number as the amount in my recipe.
For example, sugar. I had six recipes. The sugar called for in those six recipes was: 1 cup, 1 cup, 1 cup, 2/3 cup, 3/4 cup and 2/3 cup. I added all the sugar amounts together and divided by six to get 0.74 cups and then rounded it up to 3/4. Sound tedious? It actually brings me a great deal of joy that I can’t quite explain. Oooh! Oooh! Plus, I doubled the recipe; more math!

When I was all done with the math for my recipe, I added in a few ingredients of my own. One of my original recipes called for milk, one for sour cream, and one for cream cheese. When those ingredients were averaged in, they didn’t account for much of the total recipe, so they weren’t included. Except, I happened to have a half a container of sour cream in the fridge. I myself am not a fan of sour cream, but I needed it for a recipe so I decided to go ahead and add sour cream after all so that I could use it up before it spoiled. And, I added WAY more vanilla than the averages called for. Plus, cinnamon. It wasn’t in any of the recipes and I just felt like putting it in.

The batter was really thick and I thought I was going to end up with a dry bread (which I hate) but I’m quite pleased with how the loaf came out. It was very moist, had a nice flavor and if I have sour cream in the refrigerator again I could probably be persuaded to make another batch.

When everything was said and done, I ended up with this:Yummy homemade banana bread.

To make Egg-less Banana bread,
preheat your oven to 350°.

Add butter and brown sugar to the mixing bowl.

Butter and sugar

Cream butter and sugar together.Creamed together butter and sugar.

Add one egg or one “egg”.

egg substitute

2 T. water
1 t. oil
2 t. baking powder mixed together

Mix well and add sour cream and vanilla. Mix until combined and add bananas. My math said 5 1/2 but I had 6 so I used all of them. I also didn’t mash the bananas before I put them in; I broke chunks off into the mixer and then just beat the snot out of them until they looked like this.All mixed up

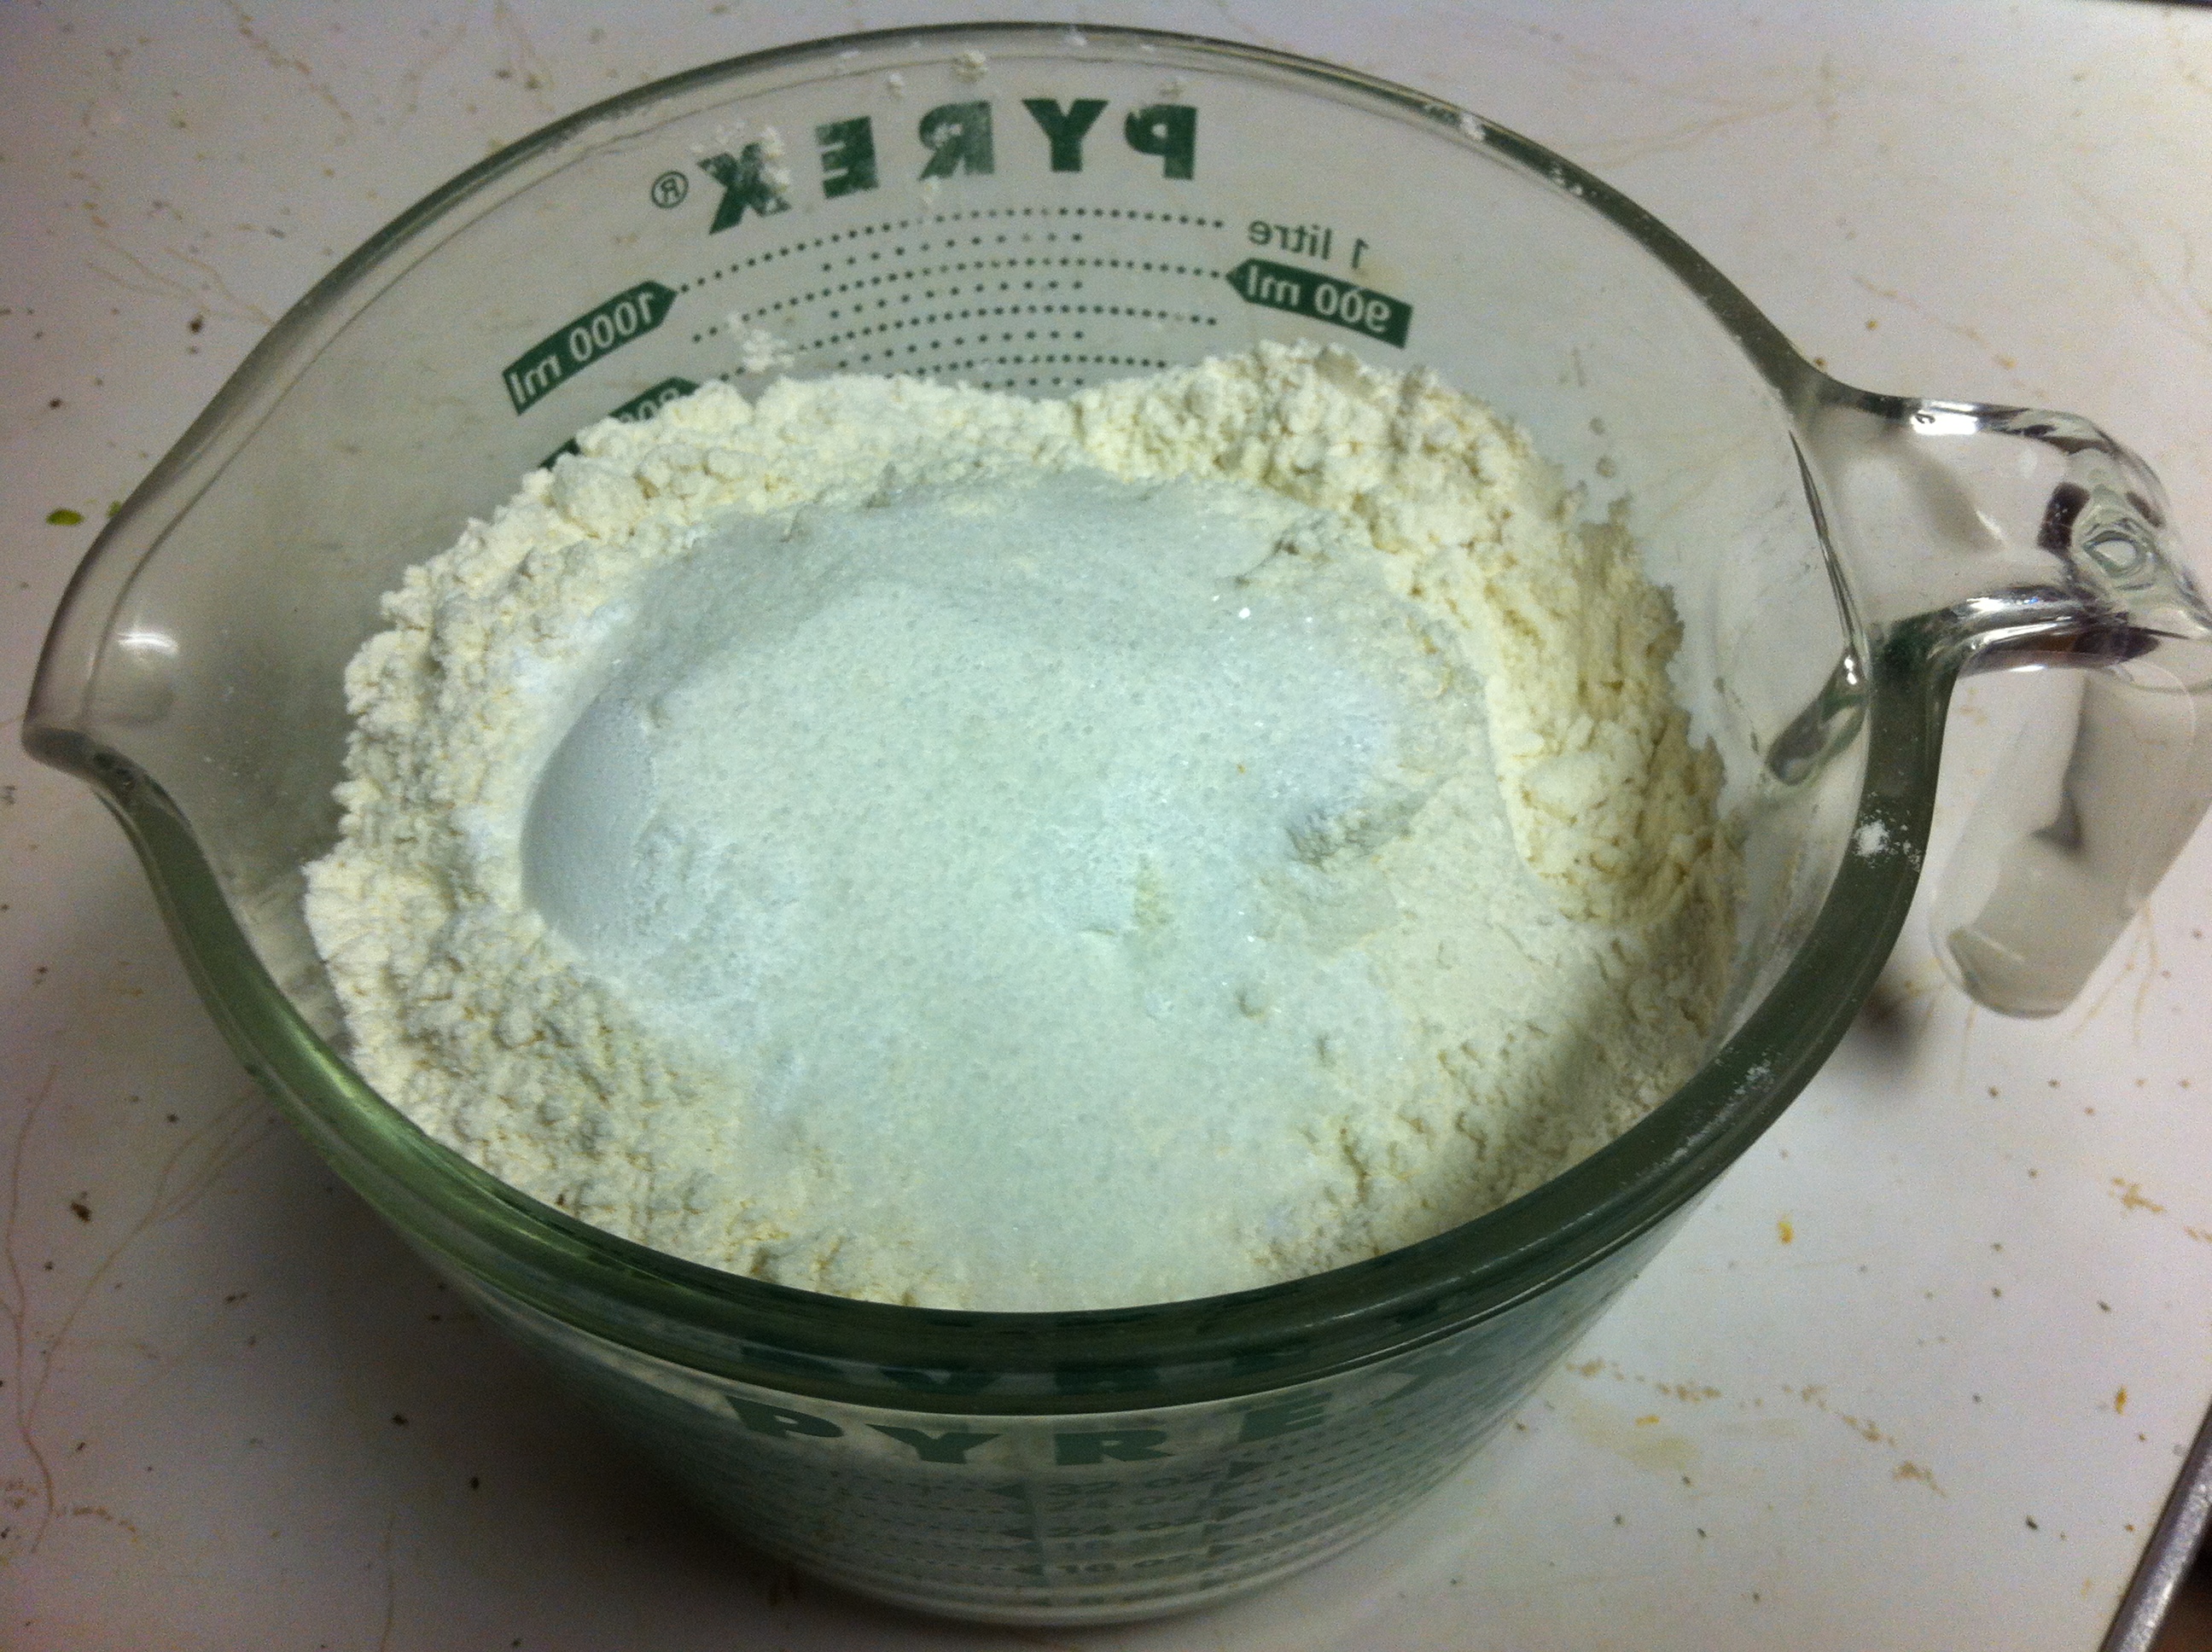
Measure the dry ingredients into a separate bowl or 1 quart measuring cup.Flour and spices

Add the dry ingredients to the wet ingredients in stages, mixing after each addition.

Grease a 9″ x 13″ baking dish or two loaf pans. Spread the batter into your pan(s) and bake at 350° for 45-55 minutes. Bread is finished when toothpick inserted in the center comes out clean.

Click here for printable version.

Egg-less Banana Bread

Makes 2 loaves or a 9” x 13” pan

Preheat oven to 350°

  • 1 cup butter

  • 1 ½ cup brown sugar

  • 1 “egg” ~ whisk together:

    • 2 T. water

    • 1 t. oil

    • 2 t. baking powder

  • 1 cup sour cream

  • 1 t. vanilla

  • 6 bananas, mashed

  • 3 1/3 cup flour

  • 1 t. baking powder

  • 1 t. baking soda

  • 1/3 t. salt

  • 1 T. cinnamon

Cream butter and sugar. Add egg substitute or egg. Mix well. Add sour cream and vanilla and blend again. Add bananas and mix well.

In a separate container combine dry ingredients. Add a little at a time, mixing after each addition.

Grease a 9” x 13” casserole or two loaf pans.

Pour batter into pan(s). Batter will be quite thick and may require spreading with a spatula.

Bake in 350° oven 45-55 minutes.

Bread is finished when toothpick inserted in center comes out clean.

Leave a comment

Filed under food

Cinnamon Caramel Monkey Bread

There’s a little restaurant in town that serves monkey bread and my family loves the stuff!

Finished Monkey BreadI’ve noticed a lot of recipes on the internet lately for the pull-apart cinnamon bread many people call monkey bread. Apple Monkey Bread, Blueberry Monkey Bread, even Crock Pot Monkey Bread. With all the buzz, I decided to give it a try.

Before I started, I looked at a lot of recipes. Like this one for Crock Pot, Apple Monkey Bread. This was the leading contender, but I decided I didn’t want to wait 2 1/2 hours for it to cook. So, I looked around some more and found these oven-baked recipes for Blueberry Monkey Bread and Cinnamon Pull-Apart Bread. I was leaning toward the Cinnamon Pull-Apart bread, but didn’t want to make actual bread before starting the recipe. For a minute I contemplated using the dough I had in the refrigerator, but wasn’t sure how the 5-minutes dough would hold up. The dough is pretty thin and I didn’t think it would hold its shape.

The other two recipes call for canned biscuits. I neither had nor cared to purchase any canned biscuits to make my bread, so I decided to whip up some biscuit dough to use. My biscuit recipe only makes 10 biscuits, so I had to double it to make sure I had enough biscuits to fill my chosen pan.

Flour, sugar, salt, tartar, baking powderStart by combining flour, baking powder, sugar, cream of tartar and salt. I measured the flour into this measuring cup and then just added the remaining ingredients on top before dumping the whole mess into my mixer bowl.

Mmm. Butter.Cut the butter into chunks and add to dry ingredients.

Butter blended into dry ingredients.“Cut” the butter into the dry ingredients until the mixture resembles coarse crumbs. You can do this by hand with a pastry cutter, a whisk or even a fork. I opted to use the whisk attachment on my Kitchen Aid mixer. ‘Cause I love it.

Milk in the well.Make a well in the dry ingredients and add the milk all at once.  I used unsweetened almond. 

Mix until blended.Using a wooden spoon, mix the wet ingredients until just blended. I used the paddle attachment on my mixer.

biscuit doughKnead the dough 10-12 times on a lightly floured surface and then flatten it out. If you were making biscuits, you could roll them out to a half an inch and then cut them, but since I was just going to make balls of dough I opted to just pinch off balls of dough that were about 1″.

Grease a baking dish. I would recommend a 9″ x 13″ pan, but I actually used a deep, 4″ x 8″ pan.

Sugar and Spice and everything nice.In a microwave-safe bowl, combine sugar, brown sugar, cinnamon and ginger. Mix together and sprinkle two-ish tablespoons into the bottom of the greased baking dish. Pull or cut balls of dough from your flattened biscuits, roll them in the sugar mixture and spread them out into the baking dish. When you are finished rolling all the biscuit pieces in sugar, there will probably be a little left. I left it in the bowl and added the butter and cider to the bowl.

Smirnoff Caramel KissedMicrowave the bowl until the butter is melted. Remove the bowl from the microwave and add the caramel vodka. The little bit of alcohol in this small amount of vodka will cook out, but if you don’t like cooking with alcohol or don’t have any flavored vodka, you can use vanilla instead. Stir to combine and drizzle the liquid mixture over the pan of cinnamon-sugar covered dough balls.

Ready for the oven.Place the pan in a preheated 350 degree oven for 30-40 minutes. Because I used a deeper dish, my bread took the whole 40 minutes to finish.

Cinnamon Pull-apart bread.

Fresh from the oven!

Cinnamon Caramel Monkey Bread

Biscuits

  • 4 cups flour
  • 2 T. baking powder
  • 1 T. sugar
  • 1 t. cream of tartar
  • 1/2 t. salt
  • 1 cup (2 sticks) butter
  • 1 1/2 cup milk

Topping

  • 2/3 cup brown sugar
  • 1/3 cup sugar
  • 1 T. cinnamon
  • 1 pinch ground ginger
  • 1/4 cup (1/2 stick) butter
  • 1/6 cup apple cider
  • 1 T. caramel kissed vodka (or vanilla if you prefer)

In a bowl stir together flour, baking powder, sugar, cream of tartar and salt.
I used the whisk on my Kitchen Aid mixer to cut the butter into the dry ingredients, but you can do it by hand with a whisk or dough cutter until the mixture resembles coarse crumbs.
Make a well in the center of the dry ingredients. Add milk all at once. With a spoon (or the paddle attachment of your mixer), stir just until the ingredients are blended.
On a lightly floured surface, knead the dough 10-12 times and pat it flat.

2 Comments

Filed under food

Hoppin’ John?

This all started with this:

Thirty-nine Cents?!?

Thirty-nine Cents?!?

Mr. Hippie and I were doing the shopping last week. As usual, we stopped by the bargain bin to see if anything interested us. Usually, there isn’t much but some banged cans or some really old, unpopular merchandise. Imagine my surprise when I found it chock-full of these cans of ORGANIC soybeans for only thirty-nine cents!

Since Gwen is a vegetarian, this could be a major score. But, I’ve never cooked with canned soybeans before so I didn’t want to overreach and buy up the cart. I bought a few cans so that I could experiment with them and make sure we would eat them. A deal is only a good deal if you’ll actually use it!

When I started researching recipes for soybeans, I didn’t come up with much so I decided to just substitute them for other beans in recipes. Hoppin’ John is a traditional New Year’s dish made with black-eyed peas, vegetables and ham and is usually served over rice.  Of course, Gwen won’t eat ham, so I had to modify more than the beans to make this dish family-friendly.

Start by adding about a tablespoon of olive oil to a heavy bottomed-pan or dutch oven. Once the oil is hot, add the chopped vegetables.

Mis en place

Celery, carrots, peppers and onion chopped and ready to cook.

Simmer the vegetables over medium heat until the onions begin to sweat. Add garlic and stir for a few more minutes.

Sweating the vegetables.

Mmm. Garlic

Chop a jalapeno finely and add it to the vegetable mix. Mine are all red because I picked them from the garden so long ago.

From the garden.

Red Jalapeno

Stir the jalapeno around for a minute and add a quart of chopped, canned tomatoes. Cook the mixture until the tomato juices simmer down and begins to thicken.

Simmah down now!

Simmah down now!

Sprinkle the blend liberally with Rustic Rub and cook for a few more minutes.

Spicy goodness.

Rustic Rub

This is where my cooking always gets tricky. Gwen doesn’t eat meat. Dylan won’t eat beans.  (And you thought Jack Sprat and his Wife had a rough time in the kitchen!) When I make dishes like this, I have to split the base and add ingredients in stages. Unless you have a vegetarian and a picky eater in your house like I do, you can just add the rest of the ingredients and simmer until it’s finished.

I took about 1/2 of the mix out of the big pan and put it into a smaller pan. Then I added 2 cups of water and the beans to the small pan and simmered it until it was cooked through and the liquid reduced.

Finished Veggie John!

Finished Veggie John!

Traditional Hoppin’ John calls for a ham bone to simmer for a while. I didn’t have one and I’ve been on a sausage kick so to the other pan I added a half pound of cooked, bulk sausage and 2 cups of homemade ham stock.

pot two

Simmer the meaty mix down until the sauce is thickened. Once the sauce was thick I scooped a serving out for Dylan and then added half the bean mixture back into the pot.

Finished Hoppin' John

The finished Hoppin’ John ready to scoop onto rice!

In some homes, Hoppin’ John is a New Year’s tradition. I’ve never tried it before, and didn’t make it on New Year’s Day, but after trying this recipe, I might have to make it  a tradition around here!

Oh, and those beans? I went back and bought the 30 cans they had left over.


Hoppin’ John

1 tablespoon-ish olive oil
1 onion, diced finely
2 carrots, rustic-chopped
2 ribs of celery, chopped
1/2 a large or one small bell pepper (I used yellow because that’s what I had)
1 Tablespoon minced garlic
a chopped fresh jalapeno, or chili powder to taste
1 quart canned, chopped tomatoes
2-3 Tablespoons rustic rub
1 can soybeans
1 quart stock or water
1/2 pound cooked sausage or ham

Add oil to a hot, large, heavy-bottomed pan. Add onion, celery, pepper and onion and saute until onions “sweat” and become translucent. Add garlic and saute for 3-5 minutes over medium heat stirring constantly. Add the jalapeno or chili powder and stir until blended. Add tomatoes and simmer until thickened. Add rustic rub to taste. Add sausage, beans and stock or water and simmer until thickened.

Serve over rice.

Leave a comment

Filed under food, frugality

2013~ A Year in Review

2013 was a busy year. I didn’t blog much, but I did get a lot done.

I have a daughter that is now a senior in high school and a son that left elementary to move up to the big leagues of middle school. Hubby got (and rejected) two job offers. One was definitely not a better job. The other would have been a pay raise but would have caused a ridiculous amount of stress for Mr. Hippie. Mr. Hippie’s ulcerative colitis doesn’t do well with stress, so although I still pine for the extra income that would make our fiscal lives easier, I am grateful for his time with our family and for his health.

Will 2014 be The Year of My Blog? I don’t know the future, but I hear that the road to Hell is paved with good intentions. Regardless of what 2014 brings, I’m leaving 2013 with a bang!

The top posts always surprise me a little, but it helps me understand what people actually want to read! Apparently the movement toward healthier, greener cleaning hasn’t lost steam and people still love animals!

Coming in at number one:

Vinegar and oil(s)Homemade Fabric Softener

housing for two rabbits

Home to our breeding pair.

Building a Rabbit Hutch

Finished loaf cooled, sliced and ready to eat.

Freshly baked bread in five minutes?

Crusty Round Loaves of Homemade Bread

Homemade Laundry Detergent

Homemade Laundry Detergent

Soap after the mold has been removed.

How I Made Homemade Soap (and Didn’t Screw it up)

Some of the finished treats.

Homemade Dog Biscuits

Supplies needed to make your own.

Homemade Dishwasher Detergent

Sink Scrub

Homemade Scouring Powder

Chicken Tractor

Chicken Run

Pinot Jelly

Pinot Noir Jam

Thanks for sticking around to hear what I had to say even when I didn’t have much to talk about!

Leave a comment

Filed under green cleaning, Miscellaneous

Making the Most of What’s in the Fridge/Freezer~Sausage and White Bean Soup

In my last post I mentioned that I had gone back to planning dinner menus for the week. Planning the menu in advance saves me time and money. It also helps make sure that I don’t serve tacos twice a week. Which I would absolutely do if Mr. Hippie would let me get away with it. If I plan the menu on the weekend, or Mr. Hippie’s day off, we can get a bunch of prep done when we have more time.

This week’s menu looked like this:

  • Saturday: Taco Salad
  • Sunday: Sausage and White Bean Soup with cornbread
  • Monday: Mac ‘n’ Cheese
  • Tuesday: New Year’s! Potluck at a friend’s; we’re bringing dessert, so I’m off the hook for dinner.
  • Wednesday: Pulled Pork Tacos
  • Thursday: Hot Dogs and Tater Tots
  • Friday: Brined Chicken with roasted potatoes and green beans

Saturday was cooking day! I started by soaking white beans. Next I pulled the ground beef for the taco salad, pork roast for the pork tacos and the whole chicken out of the freezer so that they could thaw. After that I started making my chicken stock.

While the stock simmered, I made a vat (two, 1 lb. boxes worth) of macaroni and cheese. I filled 6, pint containers with plain mac ‘n’ cheese and then stirred the last of our leftover Crock Pot ham into the pan and filled 3, pint containers with ham mac ‘n’ cheese. There are 6 pints of pasta in the fridge ready for tonight’s dinner and the leftover ham is cleared out of the fridge. Plus I have three extra containers of mac ‘n’ cheese in the freezer for lunches later.

Once the macaroni was packed up, I started the Sausage and White Bean soup.

I love this soup because it utilizes leftovers if you have them, or it can be made without leftovers if you just want soup.

Sausage and White Bean Soup

1 tablespoon-ish olive oil
1 onion, diced finely
2 carrots, rustic-chopped
3 ribs of celery, chopped
3-5 leftover bratwurst or polish sausage chopped into bite-sized chunks, or 1 lb. bulk sausage
one whole chipotle in adobo, a chopped fresh jalapeno, or chili powder to taste
1 quart canned, chopped tomatoes
6 cups chicken stock
3 cups soaked, cooked white beans (or canned white beans)~ I cook my beans while I’m prepping everything else.

White Bean and Sausage SoupAdd oil to a hot, large, heavy-bottomed pan.
Add onion and saute until onions “sweat” and become translucent.
Add carrots and celery and saute for 3-5 minutes over medium heat stirring constantly.
Add the chopped sausage or fresh bulk sausage. Cook until chopped sausage is heated through or bulk sausage is fully cooked.
Add chile and stir until well blended.
Add stock and tomatoes and simmer until soup reduces slightly and flavors have time to blend.
Add beans and cook until heated through.

At this point I jarred the soup up to serve the next day and started my taco salad, but you could serve the soup immediately if you preferred.

3 Comments

Filed under food, frugality

Stone Soup

I’ve always been cheap frugal, but my frugality ebbs and flows with my mood, our finances and the needs of my family. I don’t buy myself new clothes except for the occasional pair of tights, knee-highs or other derby wear. We’ve been driving the same used car for as long as I can remember. We buy in bulk and make our own as often as possible.We shop resale.

Despite my cheap ways, it seems like we never get ahead. Over the past 19 years, hubby and I have accrued debt. Mortgage debt, student debt and unfortunately, credit card debt. We’ve been working on paying things down, but life happens. Three years ago hubby got down-sized. He was unemployed for four months before he finally got a job cooking at the restaurant he left to work construction. The pay cut was significant. He’s had raises since, but he’s still not up to his construction salary and his hours fluctuate based on business. As a school teacher, I make a decent salary. My health insurance is very good and I get time off in the summer. This isn’t a rant about all the things teachers do in their “time off” or the current politics of education,  so I’ll spare you the details, but my salary has been frozen for several years while the costs of my healthcare and retirement have gone up. I’m taking home less now than I was three years ago.

So, with costs rising and our salaries stagnant, what do we do?

I’m working on some extra sources of income but I don’t have enough time for a steady part-time job during the school-year. I’m trying to find ways to get paid to do what I love.   Along with the required continuing education I  have to take to maintain my teaching certification, I’ve started learning new computer skills so that I can try some technology jobs from home. My etsy site is going to have some new items soon including some hand-knit & crocheted baby hats. None of these things will make me wealthy, but maybe they can make ends meet.

In the meantime, it’s time to tighten the belts again. We’re turning the heat down some more and wearing more layers. I’ve gone back to planning a menu for the week so that we’re not frantic at dinner time buying something to cook. We’re eating out of the freezer instead of filling it. We have a deposit on a whole hog from Quartz Farm to save money on our meat and we’re still raising rabbits. We’re trying new recipes, and eating lots of soup. Homemade soup is a super cost-effective way to eat. I can use up all the leftovers in the fridge along with a low-cost grain like rice, barley or pasta and make a healthy, cost-effective meal for my family. Tonight we had white bean and sausage with a side of cornbread.

Have you ever heard the story of Stone Soup? It’s an old folk story in which hungry strangers persuade local people of a town to give them food. If you check most any soup recipe, you’ll find that it starts with stock. Homemade stock isn’t exactly like Stone Soup, but basically you start with nothing, add a bunch of stuff you were going to throw away anyway and cook it util it’s useful. Stock doesn’t cost that much, but at $2 a quart, it adds up. Especially if you’re having soup more than once or twice a week. If you’re making a gallon of soup a week, homemade stock can save you $4 or more a week.  We’ve been making our own for years and we’re pretty efficient at it. Sometimes we make ham stock, but most often we make chicken stock. I keep a few old five-quart ice cream pails kicking around the cupboard for storage. Onion scrapsWhenever we cook chicken, we put the bones into a pail and keep them in the freezer until we get two-or three full pails. Usually, we cook whole chickens, and add the carcasses and all the drippings to the bucket but when we have chicken pieces, Mr. Hippie bones the chicken before it’s cooked and those bones go into the bucket as well. When I’m being really frugal, I save the ends of carrots, onions and celery in a freezer container too. Onion skins add a really nice color to your stocks.

Stock potHomemade Stock

  • 2-3 pails of chicken bones, saved in the freezer for as long as it takes you to collect that many bones.
  • 2 carrots, or an equivalent volume of carrot ends and peels saved from whatever other carrot dishes you have prepared recently.
  • The leafy parts of a head of celery along with any ends you want to trim off and throw in.
  • An onion or the tops, bottoms and skins of several onions.
  • Parsley stems or some fresh thyme if you have some handy.

Add all the bones and vegetable scraps to a large stock pot. Cover with water and bring to a boil. Reduce heat and simmer all day or overnight.

Jars of stock

Finished Chicken Stock

Once the stock has a nice color and flavor, remove it from the heat and strain it into jars. Leave head-space so that the jars can be frozen until you are ready to make your own soup or gravy. Make sure to label and date the jars so you know what it is and which jars to use first.

2 Comments

Filed under frugality

Rhubarb Two Ways or Canning, Continued.

There are few things that I can’t live without. My KitchenAid Mixer probably tops the list. Coming a close second would have to be my freezers. Yes, I said freezer(s), plural. Of course I have the small freezer that is part of my refrigerator, but I also have a small chest freezer. And a larger, stand-up freezer. Both are mostly full most of the time. Of course, the contents vary from day-to-day and season to season, but I keep them pretty loaded. When things come into season, I try to can as much as possible. Sometimes, I don’t have time to can everything I want before it will spoil, so I freeze the excess until I have time to deal with it. I do that with tomatoes. A lot.

Last year I had an abundance of rhubarb.  I made some delicious Rhubeenas and still had a bunch left over so I chopped it up and threw it into the freezer. With summer’s bounty (and strawberry season) nearly upon us, it’s time to clear some space in the freezers.

 In the first Can Jam, I used asparagus as the May ingredient, but Rhubarb was also an option. Among the rhubarb recipes was a recipe for Rhubarb and Cinnamon Jam from Seasonal Menus. I love cinnamon and have a jar of extra-long cinnamon sticks, so I thought I’d give it a go:

Rhubarb the First Way

  • 2lbs. sliced rhubarb
  • 2 lbs. sugar
  • 3 extra-long cinnamon sticks, broken in half
  • 2 T. lemon juice

Combine rhubarb and sugar in a nonmetallic bowl.
Let macerate overnight in the refrigerator.
Set up canner and boiling water bath; wash and sterilize jars and lids.
Transfer rhubarb mixture to a saucepan.
Add cinnamon and lemon juice.
Heat over medium heat, stirring often until sugar is completely dissolved.
Bring to a boil.
Boil until jam sets.
Remove cinnamon stick pieces, add one to each jar and ladle jam into hot jars.
Process in water bath for 15 minutes.

The cinnamon flavor wasn’t very intense, but I know from experience with my Chai-Spiced Apple Rings that the cinnamon flavor blooms as the jars age. I expect that even the color will turn warmer with time. This recipe made almost exactly five 1/2 pint jars.

For a printable version, click here: Rhubarb Cinnamon Jam Printable Recipe

Rhubarb the Second Way doesn’t help fulfill my Can Jam goals, but it does help me complete my goal to can enough jams/jellies to get us through the year, and it helps me meet my food storage goal. I snagged this recipe from Tigress but made some modifications. First, she used lavender sprigs; I opted for dried blossoms. They looked quite lovely after their overnight in the fridge, but I know from my soap-making experience that the magenta-purple cooks away. She also includes an extra step: “pass (rhubarb) mixture through a strainer and pour collected juice into a non-reactive pan. add honey and bring to a boil. skim any foam that collects on top and continue cooking until 221 F on a candy thermometer.” Afterwards she returns the solids to the boiled juices and re-boils the whole mess. I’m not sure of the point, but her jam was lovely. I myself hate the mess straining creates and don’t do it unless absolutely necessary. Mine tastes delish and has about the same look as hers, so I don’t think it is an essential step.

Rhubarb The Second Way (Honey Lavender Rhubarb Jam)

2 pounds sliced rhubarb
2 1/2 cups granulated sugar
3 ounces light honey
3 T. lemon juice
3 tsp. dried lavender blossoms

1. Combine rhubarb, sugar, lemon juice and lavender blossoms in a nonmetallic bowl. Stir this mixture gently, cover with a plate and macerate in fridge overnight.

2. In the morning, prepare the canner and boiling water bath; wash and sterilize jars and lids. Turn heat down and leave jars in canner until ready to fill.

3. Pour rhubarb mixture into a non-reactive pan. Add honey and bring to a boil.  Continue cooking until the jam is sufficiently set. Process in a hot water bath for 5 minutes.

yields approximately five 1/2 pint or two pint jars.

Again, if you prefer a printable version, click here: Honey Lavender Rhubarb Jam Printable Recipe

Not only did I clear up some space in the freezer, but I’m a quart-and-a-half closer to my jam and food storage goals!

Leave a comment

Filed under 101 in 1001, canning, food

Foraging

Due to the bizarro weather we’ve had around here lately, Mother Nature is all out of whack. Estimates on crop losses from the orchards around here are around 90%. Other edibles that aren’t as sensitive to frosts are ahead of schedule. Take morels for example.

My usual “window” for foraging morels runs somewhere from the 21st of April to Memorial Day. This year, hubby and I started finding those elusive fungi the last week in March. These photos are actually from the first three weeks of April. We did pretty well for a while, and I did dry some to use throughout the winter, but the season that started three weeks early seems to have dried up three weeks early as well. When I went searching on Mother’s Day 2012, I found only one, and that was an accident. It had been kicked over by someone or something and dried out long before I stumbled upon it.

Despite the fact that I didn’t find any morels on this year’s hike, I didn’t come home empty-handed. Dylan and I ran into my friend Stephanie and her kids. They were looking for ramps, so we joined them. Dylan and I came home with a mesh produce bag filled with ramps (or wild leeks). I’ve used some of them in cooking since then, but my real goal was to can them. More precisely, to pickle them.

If you can find them, pickled ramps can be quite pricey. I’ve made them before and everyone that’s ever tried them loves them. However, I’ve become quite a hoarder. I dole them out sparingly to friends and family members that will appreciate them as much as I do. When we open a jar, it is hard not to eat the entire thing. Once all the delicious ramps have been devoured from the pickling brine, I add it to BBQ sauces, marinades and dressings; the flavor is exquisite.

From the bag Dylan and I brought home, I managed to can five half-pint jars. This isn’t enough for me to check #58 off of my 101 in 1001, but it is a good start. It also gets me 1.25 quarts closer to my pickle goal for #53!

For the recipe, check out my Jerked Onion recipe from the Can Jam and substitute whole ramps for the cut onions, or click here for a printable version: Jerk Pickled Ramps Printable Recipe


Leave a comment

Filed under 101 in 1001, canning, food

Let the Canning Commence

Last summer I helped my friend Joan of Olds Farm plant, weed, feed, harvest and shuck her wares. I even dragged the kids along with me a few times. Needless to say, Dylan no longer wants to be a farmer.  In exchange, I received a great bounty of produce and farm-fresh meats. It was win-win.

So, when she called last month and asked me to help her run her tables at the Farmers’ Market for three weeks, of course I said yes. Each week I came home with a giant box of goodies. Spring greens, ground beef, chicken and pork sausages, garlic, leeks, onions and . . . asparagus!

The first week I grilled all the asparagus and spring onions I brought home and consumed them within three days. The second week I brought home a much larger bag of asparagus. I continued to grill and eat large quantities of asparagus, but there was actually enough left over to can and freeze some.

Photo by Tiffany Copeland Godden.

Yesterday, a terrible storm blew in and it rained all morning. At one point, the sky was so black that it appeared to be evening and it was so still I thought there would be a tornado. Yard work was out of the question and the house was nice and cool so  the weather was perfect for canning.

I dragged out the giant bag of asparagus and my pickled asparagus recipe from the Can Jam. The recipe is there in a step-by-step illustrated version, or you can download the printable copy here: French Tarragon Pickled Asparagus Printable

I didn’t get seven jars this time, but I also didn’t weigh/count my spears. I only had these five, tall-ish jars available, so I cut enough spears to fit into the jars. When I was done I had enough asparagus left over for one more dinner and a pint of frozen asparagus.

I’ve never frozen asparagus before and I was afraid it would all turn to mush so I searched The InterWebs for advice. After consulting various “experts”, I decided to take none of their advice and do it my own way. I present to you The Method.

The Method

  1. Clean and cut your asparagus spears.
  2. Fill a CLEAN kitchen sink or large pot with ice and water.
  3. Bring a pan of water large enough to hold all of your asparagus to a boil.
  4. Set a timer for one minute.
  5. Rapidly add all the cut pieces of asparagus to the boiling water.
  6. As the timer counts down to zero-ish, remove the pan from the stove.
  7. Quickly drain the asparagus and add the hot pieces to the ice bath.
  8. Stir the spears around in the bath to quickly cool them.
  9. Remove the cut pieces to a towel to drain.
  10. Spread the cooled pieces onto a plate or cookie sheet and place in freezer.
  11. After the pieces are individually frozen, place them in a freezer container.
1 pint frozen asparagus

Yum.

Okay, so most people blanch their asparagus, but I did it for less than a minute and I was really quick about getting it into the ice bath. Conflicting info from the internet makes me wonder if this will help at all, but I’m hopeful. They look beautiful at least.

Storage count: 2.25 quarts pickles.5 quarts frozen vegetables

1 Comment

Filed under canning, food

In Search of the Perfect Brioche

When I was working for 9 Bean Rows in trade for my CSA share, I became acquainted with brioche. If you’re not familiar, it is a flaky, buttery egg bread. When toasted and slathered with raspberry jelly it easily passes for a jelly donut and is probably just as bad for your diet.

Tired of spending $5 a loaf for the stuff, I decided to make it myself. I bake. It can’t be too difficult, right? Wrong. I tried to make a loaf and it turned out horribly. Dry. Almost crumbly. It was so bad that I didn’t even note which recipe I used. It was then that my quest for a decent recipe began.

I’m still working my way through recipes, but I thought I should keep you posted in case you, like me, are on a quest for The Perfect Brioche. This recipe wasn’t bad. I would actually consider trying it again on a day when I had more time because I rushed it a little and that could have affected the final product. The texture was right, but it was dry. How can ANYTHING with almost a pound of butter in it be dry??  As a dinner roll, the bread was okay. It fared much better as toast, but its real redeeming quality was that it made the best french toast ever. Another plus? This recipe doesn’t require the shaping of loaves, you just dump the dough into a pan or muffin tins and let it rise.

This recipe is from Emeril Lagasse’s Lousiana Real and Rustic.

Brioche

Starter
3 envelopes (6 3/4 tsp.) yeast
1/2 C. warm milk (about 110°)
1 C. flour

Combine the yeast and milk.
Stir to dissolve the yeast.
Add flour; mix well.
Let sit in a warm, draft-free place 2 hours.

Dough

4 C. flour
6 eggs
1/2 C. warm water (about 110°)
3 T. sugar
2 t. salt
3 sticks butter at room temperature plus extra for greasing pans
1 egg yolk, beaten

  1. Put 2 cups of flour into a large mixing bowl. Add 4 eggs, one at a time beating thorougly with a wooden spoon after each.
  2. Add water, sugar and salt. Mix well.
  3. Add three sticks of butter and mix in with your hands until it is well blended.
  4. Add remaining two eggs and mix well.
  5. Add remaining flour. Mix well and break up any clumps of flour.
  6. Knead the starter into the dough with your hands. Continue kneading until well mixed; about 5 minutes. The dough will be sticky and moist.
  7. Cover with a clean damp cloth and let rise in a warm, draft-free place 2 hours.
  8. Butter two 9″ x 5″ x 3″ loaf pans or two standard 12-muffin pans.
  9. Punch dough down lightly and divide into baking pans.
  10. Brush tops with egg yolk.
  11. Cover and let rise until double, about an hour.
  12. Preheat oven to 400°F.
  13. Bake loaves 25-30 minutes or muffins 20 minutes until tops are golden.

2 Comments

Filed under 101 in 1001, food