Tag Archives: recycle/upcycle

Why Resale Shopping is Better Than Retail Shopping

I have shopped at resale stores for years. Goodwill is one of my “must stops” when I actually drive around, but there are a few others in town that I frequent and several others that I visit once in awhile.

There are lots of reasons I love resale shopping. First of all, it is much cheaper than retail shopping. Jean Jacket? $7. You can find all kinds of goodies for a fraction of their retail price. Sometimes resale shops even take “leftovers” from retail shops. I got a brand new, still-in-the-box deep fryer for $10.

But, “brand new, still-in-the-box” is not what I look for at resale stores. In fact, not having to deal with all the packaging that accompanies new merchandise is one of the things I love most about resale shopping. Have you seen all the plastic, styrofoam and even twist-ties that come on new stuff? The box is often twice the size of the coontents because of all the extra crap they cram in there. When you shop resale you don’t have to dispose of even more waste. Even though I recycle when I buy new, not everyone does. Resale reduces waste.

Haggling is acceptable. Now, you can’t get out of control with the haggling, but the staff at resale shops usually appreciates it when you let them know if a price is out of line. They want to sell their stuff and won’t if the price isn’t good. Most of my canning jars came from Goodwill. Sometimes when I go in there the jars are marked $.99 each. I won’t buy jars for that price; I can buy them new for less than that. But, if you tell the cashier what the jars retail for new, they’ll mark them down. I’ll buy quite a few jars at fifty cents apiece, but I’ll clean them out if they are a quarter each.

Lots of things that seem like a good idea but take up a lot of space can be found at resale shops for a reasonable price. I buy a LOT of housewares at resale shops. For example:

New pitcher for the ancient Osterizer blender that I dropped and broke.Blender jar (BTW, if you drop your favorite glass blender pitcher on the floor and it breaks, you can screw a standard-mouthed mason jar onto the base as a temporary fix. Screwing a canning jar to the blades also works if you want to make individual smoothies in different flavors or want to premix a bunch for storage.)
Ice cream maker
Bread machine for school
Fermenting crock
Super-deluxe, stainless-steel colander that I use for everything
Drinking glasses
Jelly/cheese straining bag (So, it’s really a cotton pillowcase, but whatever.)

Many resale shops offer you a discount on a future purchase when you donate your old stuff. Cleaned out your closet? Take the old stuff to a resale shop. Somebody will probably love your “old” outfits and you could get 10% off your next purchase.

Lots of thrift stores benefit charities. Women’s Resource Center benefits battered women and their children. Goodwill helps people find jobs. Shopping resale benefits people in your community.

Rundrand TulipToday the reason I love resale shopping is this beautiful Weck canning jar. I have been wanting to try Weck Jars for a while now, but they are quite pricey. This 1 Liter, BPA-free jar cost me $5. It was probably too much since it rivals the actual retail price of the jar and was most of the money I had left from my March allowance, but I can try it out and see how it works before I invest a fortune on more fancy-shmancy canning jars. If I don’t like it for canning, I can always store dried beans or coffee or something in it.

4 Comments

Filed under canning, frugality, green living

How I Made Homemade Soap (and Didn’t Screw it up)

I’ve attempted this before, but it didn’t work out so well.  You can see the finished, botched soap in this post

This time, things worked out much better.  Just like the first time, I started with bacon fat.  

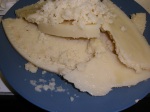
Jar of dirty pork fat

Upcycling this dirty old jar of grease.

 And, just like last time, I washed the fat.  However, this time I decided to use only one jar of fat instead of two.  This helped speed the process up measurably.   I washed the fat twice just like last time to get out all the residual bacon bits.  

What I knew this time that I didn’t know the first go round is that washing the fat takes longer than any other step in the process.  You can save yourself a lot of time in your soap making by using other fats that are already clean.  Olive oil comes to mind.  So does coconut.  You can even find directions on the internet for Crisco based soaps.  For now I’m sticking with bacon fat because I always seem to have some around and I don’t have to buy it.  Someday I would like to try an olive oil (castille) soap but I’m going to refine my skills with bacon grease first. 

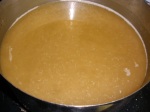
Fat after washing twice.

Washing the fat is the longest step in the process.

Now that you’ve washed your fat, it’s time to actually make some soap.  My directions from the first experience were pretty thorough, but I learned a few things along the way so I’ve added those golden nuggets of wisdom so that you don’t make the same mistakes I did.  

  1. Clear your workspace of young children and pets.  Lye is not dangerous if you respect it and follow safe handling precautions, but children and chemicals don’t mix.
  2. Weigh and melt the fat. 
    Melted soap fat

    The fat liquified and ready to be made into soap.

    THIS IS VERY IMPORTANT.  Inaccurately measuring my ingredients was the biggest mistake I made the first time I made soap.  I used too much lye and the result was a chalky, crumbly soap.   This time I got a more accurate kitchen scale.  I want this fancy-shmancy one but I’m not willing to spend that much money on it.  I found a used one for $60 but I wasn’t ready to spend that much either.  We’ll see how much soap I actually make before I start forking out the big bucks on equipment.  My new kitchen scale cost $1 at the Women’s Resource Center.  It seems to work just fine for what I need. 

  3. Once the fat is melted, use this lye calculator to determine how much lye you will need. 
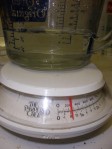
    Water on the scale

    The mass of the water only; I set the scale at zero with the measuring cup on it.

    It will tell you how much water and lye you need based on the type and mass of fat you have.  It will even let you use multiple types of fat so that when you become a soap expert you can create new recipes. 

  4. Once you have calculated how much lye and water you need, sprinkle the lye into the water IN A HEAT-PROOF GLASS CONTAINER and swirl with a silicone or rubber spatula.  (This is an exothermic reaction and gives off A LOT of heat; use caution.)  This is where I made my second mistake the first time I made soap.  I knew the lye mixture would be hot.  I knew it needed to cool.  I just wasn’t sure how much it needed to cool. 
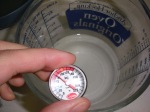
    The solution is cool enough to use now.

    The lye-water solution has cooled to about 82 degrees.

    I talked to my soap-maker friends and learned that the temperature of both the lye-mixture and the fat are critical to the finished product.  Here the lye has cooled enough to combine with the fat.  It is just over 80 degrees.  The fat should be about the same temperature; warm enough to be liquid, but not too hot.  If your fat and lye solution are too warm, the resulting soap can be brittle.  (Like mine was last time.) 

  5. Once the fat and lye are both under 100 degrees slowly and carefully pour the lye solution into the fat and stir continuously with a stick blender.
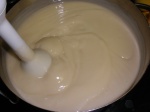
    lye mixture combined with the fat

    Stir the mixture constantly once you have added the lye.

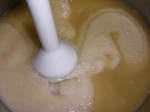
    It will take quite a while for the mixture to thicken up to the right consistency.  (Especially if you have measured your ingredients correctly; my soap reached trace really quickly the first time because I used too much lye.)  Don’t stop stirring even when your arm gets tired.  The soap is finished when it reaches “trace”.  Trace is when you can see where you have been mixing.  In the photo you can just see the path where the blender was.  

    Soap is almost ready

    The soap is ready when you can see where you were just mixing. This is called "trace".

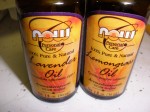
    And, in the sake of complete disclosure, this photo is from the last batch of soap; the picture of trace from this batch wasn’t so great.  If you are going to add fragrances or herbs, now is the time to do it.  Last time I added dried lavender blossoms.  That was a waste of perfectly good lavender blossoms.  They turned brown in the process instead of being lovely little purple flecks like I’d imagined.  This time I stuck with straight essential oils.  I’m particularly fond of lavender in my soap so of course, I used that but I added lemongrass again too.  

    essential oils

    Lavender and lemongrass essential oils.

    I didn’t add enough oil this time so the soap is only slightly scented.  Next time I will add much more.  One of the reasons I like homemade soaps (both mine and Fish Creek’s ) is that they make the bathroom smell lovely instead of all soap-y like commercial soaps.  The last time I opened a bar of store soap, it about made me gag.  It’s amazing how artificial artificial fragrances smell when you get used to smelling real smells again. 

  6. My friend Alicia keeps me in soap molds. 
    Will this make my soap goldfish-shaped?

    Upcycling trash into treasure.

    She provided the silk container (which wasn’t big enough for two jars of bacon fat-soap last time) and this giant Goldfish container (which was actually too big for only one jar of bacon fat this time).   Once you have blended in any fragrances you want to add, pour the liquid soap into the mold and let it cure for 18-24 hours. 

    Soap poured into the soap mold

    Finished soap in my fancy soap mold.

    Once the soap has cured for a day, you can remove the soap from the mold.  Or, if you upcycle an old container like I did, you can just peel the mold off of the soap and discard it.  I forgot to take a picture of the soap before I started cutting it, so I had to push it back together to provide you the illusion of “whole-ness”:  You get the idea.

  7. After you’ve cut your block of soap into bars, all you have to do is wait.  Soap needs to cure for awhile.  At least three weeks is recommended, but the bars will get harder and drier with age. 
Nothin' left to do but wait.

The freshly cut bars biding their time.

So, I haven’t used the bars yet but they cut smoothly and didn’t crumble or get chalky like the last batch so I’m assuming all’s well for now.  They seem to be curing nicely and will be ready for use soon.  Now that I’ve figured out the process, I think I’m ready to start playing with some recipes.  Like maybe this one.

26 Comments

Filed under crafts, frugality, green cleaning, green living

28 Days Diversion

So, the room is coming around nicely.   I’ve purged a big box and a bag full of recyclables from my space, filled a grocery sack with items to donate to Goodwill, brainstormed some storage ideas with a friend and contemplated several different furniture arrangements. Furniture. It’s just one of those things that you can’t be sure of until you’ve drug all the pieces around and around the room to see how they look. In my head they look one way, but with such a small space, I have to be sure they work before committing to anything.  I’ll have to come back to the furniture.

I’ve also washed and dusted both windows and all the surfaces I’ve uncovered to this point, removed a dead television (that I’m taking to Best Buy to be E-cycled) and vacuumed the exposed carpet.  Despite the progress I’ve made, I still have a long way to go.  The old ‘wooden’ desk has to be removed still and there are many things in and on it that need to find new homes. 

I was feeling pretty good about the room when I got to this point:

Woah!  You can actually see the top of the desk!!

The top of the desk; exposed for the first time in I don't know how long.

The desk was clear and clean.  I couldn’t tell you the last time I saw the top of the desk.  It was inspiring.  Not only because it made me feel like there might actually be hope for the room, but because I suddenly had space to work!  This brings me to the diversion part of the story.  You see, my laptop case  is soo heavy that I can’t stand to carry it around.  Plus, when I bike across town to meetings, I always wish that my laptop was in a backpack.   I’ve been storing fabric swatches for weeks intending to turn them into a backpack for my computer, but haven’t had the space to actually start a project of that size.  Until now.

Here is the finished pack as modelled by my son:

Laptop backpack

My new, custom-made laptop backpack.

I scoured the internet for a pattern, but couldn’t find what I was looking for.  I found laptop sleeve patterns, and laptop envelope patterns, but none of the patterns were for a backpack.   I wish I had a “laptop backpack”  pattern to share with you, but this is more of a protoype.  I had to rework a couple of parts because they didn’t work exactly like I’d planned the first time.  And, I’d put a loop on the back for hanging the pack if I were going to do it again.  Also, I’d figure out a different closure system for the left pocket.  But, the pack does what I need it to do and my son has already put in an order for his pack for camping. 

The pack is quilted and fully lined to protect the computer and to keep it from hurting my back.  The pockets on the back are made from old jeans pant-legs from when Gwen was three or four.  She wore the knees out of the jeans, but the applique was so cute that I couldn’t bear to throw them away.  Sometimes being a packrat pays off.  The water bottle fits snugly in the pocket without any closure, so the right pocket is simply hemmed.  The left pocket is for the computer charger and cords.  I didn’t want them jumping out so I sewed zipper from an old pair of my jeans into the top.  It’s a little awkward, but it works.   The straps came from the same pair of jeans the zipper came out of.  I cut strips out of the length of one of the legs and sewed them onto the pack.  Another of the changes I would make in the future is to sew the straps on before the top flap so that I don’t have to work so hard to hide the raw ends of the straps.  If you look closely at the bottom of the pack, you can see two metal eyelets.  For some reason I thought that would be a good feature.  Keys or something could hang from there.

The side that rests on your back

This is the side of the pack that rests against your back.

For now, the pack will have to do.  Maybe someday, when I have more time, I’ll tear it apart and rework it.  If that happens, I’ll make a pattern and post it for you so that you don’t have to make it up as you go along like I did. 

Homemade Laptop Backpack

My laptop in its new, lightweight, easy-to-carry backpack.

2 Comments

Filed under contest, crafts, green cleaning

How to Make Your Own Soap (Concluded)

This post is the third in a series of posts.  If you haven’t read Meat Day or How to Make Your Own Soap, you may want to go do that now. 🙂

  1. Empty carton upcycled
  2. Upcycle an old soymilk carton into a soap mold for your homemade soap.

Okay, maybe this isn’t the conclusion to my soap story.  However, for now it is.  I cured my bacon grease soap in the upcycled Silk carton soap mold over night just like I was supposed to.  I peeled away the carton and started slicing the soap into bars to find my soap fragile.  Crumbly.  In fact, it looked much like blocks of feta cheese: smooth-ish on the top and crumbly-jagged on the sides where it split when I tried to cut it into bars.

Tea Tree, Lavender Homemade Soap Bars

Crumbly batch of homemade soap.

I should have known to leave well enough alone.  I started troubleshooting soap flaws online.  I found that crumbly soap could be the result of a few things.  One could be too much lye.  Since I don’t have a very good scale, that was a possibility.  Or, crumbly soap could be caused by mixing the ingredients at the wrong temperatures, stirring too much, or not stirring enough.  I wasn’t sure which of these were the culprit, but from my research I determined that I could rebatch or remill my soap.

So, I ground the soap up and threw it back in the pan.  I added a little more oil (olive, ‘cuz that’s what I had) and some hot water and stirred it.  The soap looked like it was coming back together, so I dumped it into a  large, glass loaf pan.  I’d have used a milk carton, but I’d already used the only one I had.  It was at this point I saw my soap separating.  It hardened up fine, but there are holes where the unincorporated oil drained out.  Maybe I didn’t need that olive oil after all, huh?

  1. The bar I didn't remill.
  2. I should have just left the crumbly bars alone; they looked way nicer like this than they did after I remilled them.

So, what have I learned from this experiment?

  1. Don’t bother putting dried lavender blossoms in your soap; the color all cooks out and they just look like brown flecks.
  2. I need a good kitchen scale.  Accuracy is important in soap making.  I might’ve been able to avoid my remilling fiasco if I had measured more accurately the first time.
  3. Remilling is not for me.  The remilled soap is so ugly that I won’t even take a picture (and I’ve posted some ugly pics in the past.)  Once the ugly soap has cured and I’m sure it’s not too alkaline, I plan to grind it up into my laundry soap.  If I get a crumbly batch in the future, I’ll just grind it up from the start instead of wasting six hours trying to remill a lost cause.

This is not the true conclusion of my soap making, because I’ll definitely try again.  Now that I have all the kinks worked out, it should be much easier next time.  I will only use a quart of bacon grease at a time.  “Washing” the bacon fat takes WAY too long if you have to wait for it to cool between heatings.  I’ll probably also use a blend of oils to end up with a soap that is more balanced and better for my skin.

Check back soon.  I bet I’ll have enough fat in a few weeks; my bacon jar already has at least a half a cup of grease in it!

For a more succesful soap experiment, check out How I Made Homemade Soap (and Didn’t Screw it up).

9 Comments

Filed under frugality, green cleaning, green living

How to Make Your Own Soap (Continued)

If you need to clean your bacon fat, check the first post in the Bacon Fat Soap Trilogy.  Once you have clean fat that can actually be used, continue: 

Washed Bacon grease

Bacon grease clean and ready to be saponified.

  1. Bacon Fat Melted

    Clean fat melted and ready to make into soap.

    Weigh and melt the fat.  ( I had about 5.5 lbs of fat when I was done washing it.) 

  2. Do not make soap with young children or pets underfoot; it is not worth the risk of an accident.  However, there is no reason to fear lye as long as you respect it and use safety precautions. Put on your goggles and rubber gloves.  
  3.  Use this lye calculator to figure out how much lye and water you need.  (Based on the quantity and type of fat, I needed 1 quart of water and 12 oz. of lye)
  4. Water and Lye

    Lye and water mixture.

    Sprinkle the lye into the water IN A HEAT-PROOF GLASS CONTAINER and swirl with a silicone or rubber spatula.  (This is an exothermic reaction and gives off A LOT of heat; use caution.) 

  5. Fat with lye and water added

    Soap fat combined with lye-water mixture.

    Wait until the lye and water cool off and pour them slowly and carefully into the fat. 

  6. Soap is almost ready

    The soap is ready when you can see where you were just mixing. This is called "trace".

    Blend with an immersion blender until you can see where you’ve been blending. 

  7. Add fragrance or herbs if you plan to and mix well.  (I used about 30 drops off tea tree oil and 65 drops of lavender plus some lavender blossoms I harvested this summer.)
  8. Empty carton upcycled

    Upcycle an old soymilk carton into a soap mold for your homemade soap.

    Pour into soap mold. 

Check back soon to see how the soap turns out!  This post concludes here.

3 Comments

Filed under frugality, green cleaning

Homemade Laundry Detergent

I’ve been meaning to make my own laundry detergent for quite a while now.  I’m not sure what But the four jugs of “buy 1 get two free” laundry detergent I had kicking around the laundry room kept me from doing it until now.  Now, those yucky grocery store bottles of detergent are all gone so I can make my own.  This is so easy, everyone (including you) should go make some.   I wrote the recipe on the side of my container so that I wouldn’t have the trouble of losing it like I did with my dishwasher detergent.

Angela’s Laundry Magic:

Homemade Laundry Soap Recipe

Now I can never lose the recipe!

Remember how much I LOVE my Kitchenaid mixer? 

Grinding the bars of soap.

Oh, Kitchenaid, how I love thee!

One more reason: It grinds up bars of soap in no time flat. 

Shredded Bars of Soap

Shredded up bars of Kirk's Coco Castille.

I used Kirk’s Coco Castille for this batch because that’s what I bought months ago when I got it into my head that I would start making laundry detergent, but I will NEVER use it again for two reasons.  One, it is expensive; you can use Ivory soap or homemade soap instead.  And, two it has such a strong scent that I can’t stand it. 

Once you have the bars of soap ground up, dump them into whatever container you are going to use to hold your soap.  (Three bars yielded four cups of grated soap.)  Add essential oil for fragrance if you are going to scent your soap (I used a combination of lavender, lemongrass and rosemary.) and shake or stir it before adding two cups each Borax, washing soda and baking soda.  Shake or stir the entire batch until the grated soap is incorporated throughout the powder. 

I put mine into this container I got from a friend that used to hold some kind of protein powder.

Homemade Laundry Detergent

Finished homemade Laundry Magic and Wide-mouthed alternative container.

But, if your husband does laundry (like mine does) and has giant man-hands (like mine does), you may need to find a wide-mouthed container that he can easily reach into so that he isn’t deterred from doing laundry in the future.  I reused this old laundry soap container.  Best of all, it even came with its own scoop.  I use about 1/4 1/8 cup per load, but you may need to adjust the amount you use based on how hard your water is and how dirty your clothes are.

If you like this recipe you might be interested in my homemade Fabric Softener and Sink Scrub recipes

27 Comments

Filed under frugality, green cleaning, green living

Wild Fermentation (or, How to Make Sauerkraut)

This summer, my CSA box from Providence Farms made me the proud owner of a crunchy, fresh cabbage every week  for the latter part of the summer.  I enjoy cabbage, but after the first one I became perplexed as to what to do with all the cabbage.  First I made slaw.  The slaw was delicious, but you can only eat coleslaw so many nights in a row before you decide, “I don’t want any more coleslaw.”  

So, I started thinking about cabbage.  When I was a kid my grandma made freezer slaw.  I loved that freezer slaw so I decided to try my hand at it.  However, I had a problem.  The cabbages in my box were green.  Gramma’s slaw was always purple.  What was I supposed to do?  Matching is an important component of nostalgia.  I went right out and bought a little purple cabbage to add to my big green one so that I could have the desired purple slaw.  Two weeks in a row I made freezer slaw. Now I could eat coleslaw all winter instead of six nights in a row, but the freezer was full and I was still getting cabbage.  Now what?  That was about the time I stumbled on this post at “Grow the Change” about making sauerkraut. 

I did a little more research and decided to give it a go.  Of course, when I wanted purple cabbage I had green.  Now that I wanted to make kraut, I had purple cabbage.  So, my first batch of kraut was a beautiful, purple-pink color.  

Sauerkraut the first time around

Beautiful purple sauerkraut. (Note: Do not seal your kraut in a glass vessel, the pressure will build and cause leakage and quite possibly, breakage.)

I have never loved reuben sandwiches, but for some reason, that vat of homemade kraut made me want them.  Reubens became our Saturday lunch of choice and I was even coming home from work at lunch time to make myself one during the week.  Alas, all those reuben sandwiches quickly blew through my supply of sauerkraut and left me wanting more.  I bought a large head of cabbage at the Farmers’ Market and decided to give it another go. 

Sauerkraut is actually pretty simple.  Shred up some cabbage, salt it, smoosh it and ignore it for a while.  

The best gadget on earth.

The handy-dandy Kitchen Aid mixer, shredder, multi-purpose tool shredding my cabbage for sauerkraut.

So, let’s start with shredding up some cabbage.  I LOVE my Kitchenaid mixer.  Have I told you this before?? I really couldn’t live without it.  (Okay, I could live, but I wouldn’t be happy.)  Cut the cabbage into chunks that will fit into the shredder attachment on your mixer and feed them in.  Or, drag out the old hand shredder and start working on the chunks of cabbage.  Hand shredding works just as well, it just takes a lot longer. 

As you shred the cabbage, dump it into a bowl.  Every time you add a couple of cups of cabbage to the bowl, sprinkle it with a layer of Kosher salt and mash the cabbage down a little.  I don’t measure the salt, just shred and sprinkle, shred and sprinkle until you run out of cabbage.  The salt and the mashing help draw the water out of the cabbage to create a brine for your sauerkraut. 

Salting the layers of cabbage.

Add salt after every few cups of shredded cabbage.

Once you have shredded and salted all the cabbage, you have to find a way to ( let me use the technical term here: ) smoosh the cabbage.  The bowl I use is wide enough at the top to accomodate a small-sized plate and a gallon jug filled with water but any heavy, stable, clean item can be used as a smoosher.   An old, 5-qt. ice cream pail works well as a starter kraut crock.

Press the smoosher down every once in a while to assist in the formation of a brine for your kraut.

kraut press
Smoosh the cabbage to extract the juice.

  After a day, the kraut should be submerged under liquid.  If it isn’t, add enough salt water to cover the cabbage.  Cover your kraut contraption to keep out flies and dust and then ignore the kraut and let it ferment. 

Check on it every couple of days.  If it starts to get “scummy”, scrape it off.  Taste the kraut each time you check on it.  If it isn’t ready, wash the plate or lid you are using as a press and return it.  When it has fermented enough to taste like kraut, scoop it out and put it in the fridge.  I put mine into clean canning jars, but you have to screw the bands on loosely so that pressure can escape. DO NOT FILL YOUR JARS TOO FULL.  The fermentation process will cause juice to bubble out of your containers and all over the bottom of your fridge.  I learned this the hard way.  The purple jar of kraut in the first picture was way too full.   Make sure to keep the kraut covered with brine even in the fridge; if the cabbage is exposed to air for any length of time funny, unpleasant microbiology experiments can take place. 

sauerkraut crock

So cute that even dh doesn't mind it sitting on the counter.

I enjoyed my homemade kraut so much that I found this cute little crock at the Women’s Resource Center, a resale shop nearby for $4 to use.  A plastic lid and a quart canning jar filled with water fit nicely inside to use as a smoosher.

Happy fermenting!

1 Comment

Filed under food, frugality

Dairy Queen Part 2 (Or, How to Make Yogurt)

What is this?

Repurposed beverage cooler

What is this???  Don’t know?  Read on.  I love when I can reuse or repurpose old things. I almost took this beverage cooler to Goodwill on several different occasions.  It was actually in a donation bag when I rescued it for its new life as a . . .  yogurt warmer.  I don’t know about your house, but mine goes through a lot of yogurt.  I’m ashamed to admit that back in the days when we were a more “disposable” household, we went through Go-gurt by the gallons.  I’ve long since stopped buying Go-gurt for the kids because of both its waste factor and the fact that it is made of corn, coloring and chemicals.  However, Hubby was a hold-out on the Go-gurt.  He packs his lunch every day and appreciated the convenience factor of the stuff.  I finally won that battle when his doctor explained to him that he may as well eat sugar as Go-gurt since it has little or no actual nutritive value and is mostly sugar, food coloring and artificial flavoring with enough yogurt added in so that they can call it yogurt.  

Because we eat so much yogurt, this summer I started making my own.  It was actually a first step on my road to cheese, but it is so easy and economical that I can’t imagine stopping now.  If you google yogurt making, you will find lots of different recipes; some even have videos.  I’ve been making yogurt regularly enough that I have it down to a science: 

Quart Jar of Milk
Quart of milk ready to heat.

First, fill a quart jar with milk.  You can use soy milk if you prefer.  Put the jar of milk in the microwave and heat it until it reaches 110°.  (My microwave takes just over three minutes to do this.)  Many recipes tell you to heat the milk to 180° to scald it and then cool it to 110°.  I did that when I first started making yogurt, but I don’t anymore.  If you’re a purist and you prefer, you can heat the milk on the stove, but it takes a longer time and you have to watch the milk carefully and stir it often to keep it from scorching to the bottom of the pan.  Plus, you have to wash an extra pan.

Taking the temperature of the yogurt

Wait until the milk reaches about 110°

The milk may not be exactly 110° after the initial time in the microwave.  Heat it a little longer if it’s necessary.  If you have accidentally heated the milk to more than 110° or purposely heated it to 180°, you will need to wait for the milk to cool.  If you heated your milk significantly past 110°, putting the jar in a bath of cool water will help it reach the correct temperature faster.  Whether you are heating or cooling the milk, monitor the temperature fairly closely unless you like having to reheat your milk over and over again to try and get the proper temperature. The bacteria that turn milk into tasty yogurt thrive at about 110°, so keeping the temperature as close to that as possible will help ensure your success.

last of the old yogurt

The last tablespoon or so of yogurt from my last batch.

Once you’ve gotten the yogurt within a degree or two of 110°, get out your old jar of yogurt, or if this is your first batch, you can use a tablespoon of PLAIN store-bought yogurt.  Even if you are making soy yogurt, you will need to use cow yogurt as a starter for your first batch.  You can dump (or spoon) the yogurt into the waiting jar of warm milk, but I like to dump the warm milk into the jar with the old yogurt in it to rinse all the yogurt out of the jar without wasting any.  After several batches of yogurt, you may need to buy a new plain yogurt to use as a starter.  I haven’t had to buy a new starter, but I do every once in a while.

warm milk inoculated with yogurt bacteria

Warm milk dumped into the jar from the previous batch.

After I’ve dumped the milk into my old yogurt, I like to dump it back into the clean, new jar.  I feel like it helps to keep things more sanitary, but it is probably not necessary. Now that you have a jar full of inoculated warm milk, tightly screw a cap on the jar.  If you used a standard-mouthed jar you can either use a canning lid and ring or a standard-sized top from a commercially-made jam or pasta sauce with the same size lid.  Either way, make sure the lid is on securely so that water won’t seep into your yogurt in the next step. 

inoculated warm milk

The lid is on securely

Remember the beverage cooler from the start of the post?  It’s time to get that thing out.  My old cooler is the perfect size to hold a quart jar of yogurt.  Fill the cooler about half full of 110° water.  It can be a little warmer, but I wouldn’t recommend water any cooler than that.  You can warm water in the microwave or a kettle, but I’ve found if I turn the hot water on in my kitchen and let it run for a moment until it heats up, it is almost exactly 110°, so I just fill mine with hot tap water. 

yogurt in warmer

Yogurt in warmer submerged in warm water

Over the sink, set the jar into the warm water.  If you don’t do it over the sink, water will overflow all over your countertops when you submerge the jar of milk.  The jar should be completely under the water and the water should be level with the top of the jug.  This keeps the water warmer, which keeps the yogurt warmer.  Screw the lid onto the cooler and let it rest for about seven hours.  I generally make the yogurt at bedtime and take it out in the morning, but it can be made in the morning if you have time to deal with it. 

I’d show you the finished jar of yogurt, but it looks just like the jar of milk except thicker.   So, instead I’ll show you what I do with the yogurt to make it convenient and portable.  These cute little plastic cups are available in the canning department of a store near you.  They’re designed to be used in the freezer for jams, but are perfect for single serving yogurt.  They actually come in packs of five for around three dollars, but one of mine seems to have “magically” disappeared.  You can make the cups up one at a time but I like to make them all up at once to make packing lunch easier.  Spoon a little jam, jelly, honey, pie filling or applesauce into the bottom of each cup.  I used apple jelly, but I really like peach and cherry.  Scoop yogurt in on top of the spread.  Make sure you leave a little “head room” in each jar and screw the lids onto your cups and you’re finished. 

Freezer jars

Just like disposable yogurt cups from the store only reuseable!

Making your own yogurt may seem intimidating, but you have nothing to fear.  Homemade yogurt saves money and eliminates a great deal of garbage that is involved in pre-packaged yogurt.  A quart of premade yogurt costs over $3, more if you buy individual containers or organic yogurt, and even more than that if you buy locally made yogurt (if it’s available where you live).  When you make cheese, you have a lot of whey left over.  With yogurt, there is no waste, so homemade yogurt costs whatever your paid for your milk.  If you pay $3.59 a gallon for milk, you will get four quarts of yogurt for that $3.59.  Even if you buy organic or local milk, you are saving money on your yogurt.  Plus, homemade yogurt is delicious!

6 Comments

Filed under food, frugality, green living