Category Archives: green cleaning

2013~ A Year in Review

2013 was a busy year. I didn’t blog much, but I did get a lot done.

I have a daughter that is now a senior in high school and a son that left elementary to move up to the big leagues of middle school. Hubby got (and rejected) two job offers. One was definitely not a better job. The other would have been a pay raise but would have caused a ridiculous amount of stress for Mr. Hippie. Mr. Hippie’s ulcerative colitis doesn’t do well with stress, so although I still pine for the extra income that would make our fiscal lives easier, I am grateful for his time with our family and for his health.

Will 2014 be The Year of My Blog? I don’t know the future, but I hear that the road to Hell is paved with good intentions. Regardless of what 2014 brings, I’m leaving 2013 with a bang!

The top posts always surprise me a little, but it helps me understand what people actually want to read! Apparently the movement toward healthier, greener cleaning hasn’t lost steam and people still love animals!

Coming in at number one:

Vinegar and oil(s)Homemade Fabric Softener

housing for two rabbits

Home to our breeding pair.

Building a Rabbit Hutch

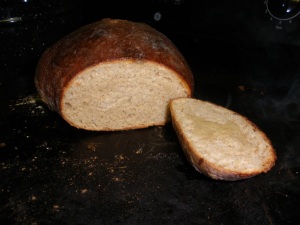
Finished loaf cooled, sliced and ready to eat.

Freshly baked bread in five minutes?

Crusty Round Loaves of Homemade Bread

Homemade Laundry Detergent

Homemade Laundry Detergent

Soap after the mold has been removed.

How I Made Homemade Soap (and Didn’t Screw it up)

Some of the finished treats.

Homemade Dog Biscuits

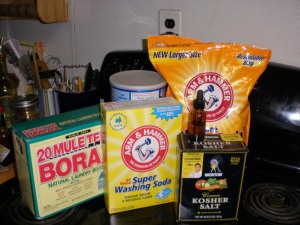
Supplies needed to make your own.

Homemade Dishwasher Detergent

Sink Scrub

Homemade Scouring Powder

Chicken Tractor

Chicken Run

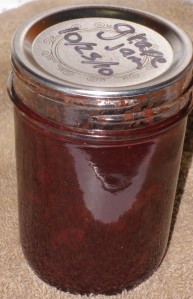
Pinot Jelly

Pinot Noir Jam

Thanks for sticking around to hear what I had to say even when I didn’t have much to talk about!

Leave a comment

Filed under green cleaning, Miscellaneous

Goodbye, 2011

2011 was a difficult year both for my family and for this blog.  If you are/were a regular reader, you noticed I wasn’t around much. I hope to change that this year.  Because I didn’t write many posts last year, I wasn’t surprised that most of the top posts last year were older posts.

As a farewell to the year gone by I present:

The Top Five Posts of 2011

  1. Brined Pork Roast
  2. Homemade Fabric Softener
  3. Homemade Laundry Detergent
  4. Building A Rabbit Hutch
  5. Crusty Round Loaves of Homemade Bread

I am surprised that the Brined Pork Roast recipe was number one. Especially because in my opinion, this recipe is much tastier.

I get lots of searches for green cleaning recipes. Pinterest has been especially helpful in promoting them. I’m glad people are being greener and I’ll try to post some more green cleaning recipes this year.

I am excited to see the rabbit hutch plans make the list.  I wonder if that is because more people are interested in rabbits for meat, or if pet owners just need plans? Regardless, I hope to post more rabbit updates soon. Until then, if you’re looking for rabbit information, check out On Breeding Like Rabbits.

Happy New Year,

Angela

Leave a comment

Filed under Charcutepalooza, food, frugality, green cleaning, green living, meat rabbits, Miscellaneous

Homemade Scouring Powder

Green cleaning is something that many companies are trying to market.  A lot of it is just “greenwashing”.  Making your own earth-friendly cleaners is cheaper, better for the environment than many of the “green” cleaners for sale, and doesn’t take very long.  This recipe is more of a non-recipe than a real recipe but I’ve decided to share my super simple Sink Scrub recipe.

While I call it “Sink Scrub”, it can be used to safely scrub most surfaces: countertops, toilets, bathtubs, the top of your stove or inside of your refrigerator.  Pretty much anywhere you would use “Comet” or other commercial scouring powders is a good place to use this scrub.

Sink Scrub

Sink Scrub

Ingredients:

  1. Borax
  2. Baking Soda
  3. Essential oil (optional)

Directions:

  1. Assemble your ingredients.
  2. Find a container with a shaker top.  An old giant-sized spice container works well.  An empty parmesan cheese container would also work.
  3. Dump or scoop equal parts baking soda and Borax into your shaker.  (I used to measure but now I just do it by eye).
  4. Add essential oil (optional) Teatree oil has antiseptic properties and makes a nice addition.  Lately I have been adding wintergreen.  It has a nice fresh, clean scent but doesn’t come off too “minty”.  A blend works too.  In my spice container shaker I add about 20 drops of oil.
  5. Cover and shake well.

That’s it.  Easy-peasy.  You may want to make one for the kitchen and one for the bath.

If you like this, you may want to check out my recipe for homemade laundry detergent as well.


7 Comments

Filed under frugality, green cleaning

Tooth Soap

By now you probably know that I make my own laundry soap and fabric softener, “fabric freshener”/ bug spray, dishwasher soap, toothpaste and even, on occasion, bar soap.  Pretty granola, huh?  Well, today I stumbled upon tooth soap.  Yuck, right?  Maybe not. 

Ambre at We Are of the Day is giving away this tooth soap from Beautiful Soaps

Pearly White Teeth

All natural and free of SLS.

It can’t kill me, and it’s better than all the poison nastiness that is commercial toothpaste, so I decided to enter.  You should too.  Really.  Go now.

Not game for tooth soap?  She’s also giving away lip balm and bar soap.  Everyone loves free soap, right?   

Some of the soaps are pretty amazing.  Actually, I may just be inspired enough to go whip up a batch myself.  I’ll keep you posted.

Leave a comment

Filed under contest, green cleaning, green living

How I Made Homemade Soap (and Didn’t Screw it up)

I’ve attempted this before, but it didn’t work out so well.  You can see the finished, botched soap in this post

This time, things worked out much better.  Just like the first time, I started with bacon fat.  

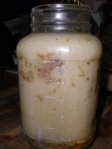
Jar of dirty pork fat

Upcycling this dirty old jar of grease.

 And, just like last time, I washed the fat.  However, this time I decided to use only one jar of fat instead of two.  This helped speed the process up measurably.   I washed the fat twice just like last time to get out all the residual bacon bits.  

What I knew this time that I didn’t know the first go round is that washing the fat takes longer than any other step in the process.  You can save yourself a lot of time in your soap making by using other fats that are already clean.  Olive oil comes to mind.  So does coconut.  You can even find directions on the internet for Crisco based soaps.  For now I’m sticking with bacon fat because I always seem to have some around and I don’t have to buy it.  Someday I would like to try an olive oil (castille) soap but I’m going to refine my skills with bacon grease first. 

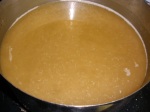
Fat after washing twice.

Washing the fat is the longest step in the process.

Now that you’ve washed your fat, it’s time to actually make some soap.  My directions from the first experience were pretty thorough, but I learned a few things along the way so I’ve added those golden nuggets of wisdom so that you don’t make the same mistakes I did.  

  1. Clear your workspace of young children and pets.  Lye is not dangerous if you respect it and follow safe handling precautions, but children and chemicals don’t mix.
  2. Weigh and melt the fat. 
    Melted soap fat

    The fat liquified and ready to be made into soap.

    THIS IS VERY IMPORTANT.  Inaccurately measuring my ingredients was the biggest mistake I made the first time I made soap.  I used too much lye and the result was a chalky, crumbly soap.   This time I got a more accurate kitchen scale.  I want this fancy-shmancy one but I’m not willing to spend that much money on it.  I found a used one for $60 but I wasn’t ready to spend that much either.  We’ll see how much soap I actually make before I start forking out the big bucks on equipment.  My new kitchen scale cost $1 at the Women’s Resource Center.  It seems to work just fine for what I need. 

  3. Once the fat is melted, use this lye calculator to determine how much lye you will need. 
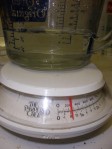
    Water on the scale

    The mass of the water only; I set the scale at zero with the measuring cup on it.

    It will tell you how much water and lye you need based on the type and mass of fat you have.  It will even let you use multiple types of fat so that when you become a soap expert you can create new recipes. 

  4. Once you have calculated how much lye and water you need, sprinkle the lye into the water IN A HEAT-PROOF GLASS CONTAINER and swirl with a silicone or rubber spatula.  (This is an exothermic reaction and gives off A LOT of heat; use caution.)  This is where I made my second mistake the first time I made soap.  I knew the lye mixture would be hot.  I knew it needed to cool.  I just wasn’t sure how much it needed to cool. 
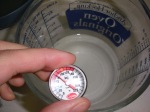
    The solution is cool enough to use now.

    The lye-water solution has cooled to about 82 degrees.

    I talked to my soap-maker friends and learned that the temperature of both the lye-mixture and the fat are critical to the finished product.  Here the lye has cooled enough to combine with the fat.  It is just over 80 degrees.  The fat should be about the same temperature; warm enough to be liquid, but not too hot.  If your fat and lye solution are too warm, the resulting soap can be brittle.  (Like mine was last time.) 

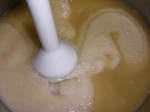
  5. Once the fat and lye are both under 100 degrees slowly and carefully pour the lye solution into the fat and stir continuously with a stick blender.
    lye mixture combined with the fat

    Stir the mixture constantly once you have added the lye.

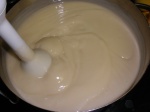
    It will take quite a while for the mixture to thicken up to the right consistency.  (Especially if you have measured your ingredients correctly; my soap reached trace really quickly the first time because I used too much lye.)  Don’t stop stirring even when your arm gets tired.  The soap is finished when it reaches “trace”.  Trace is when you can see where you have been mixing.  In the photo you can just see the path where the blender was.  

    Soap is almost ready

    The soap is ready when you can see where you were just mixing. This is called "trace".

    And, in the sake of complete disclosure, this photo is from the last batch of soap; the picture of trace from this batch wasn’t so great.  If you are going to add fragrances or herbs, now is the time to do it.  Last time I added dried lavender blossoms.  That was a waste of perfectly good lavender blossoms.  They turned brown in the process instead of being lovely little purple flecks like I’d imagined.  This time I stuck with straight essential oils.  I’m particularly fond of lavender in my soap so of course, I used that but I added lemongrass again too.  

    essential oils

    Lavender and lemongrass essential oils.

    I didn’t add enough oil this time so the soap is only slightly scented.  Next time I will add much more.  One of the reasons I like homemade soaps (both mine and Fish Creek’s ) is that they make the bathroom smell lovely instead of all soap-y like commercial soaps.  The last time I opened a bar of store soap, it about made me gag.  It’s amazing how artificial artificial fragrances smell when you get used to smelling real smells again. 

  6. My friend Alicia keeps me in soap molds. 
    Will this make my soap goldfish-shaped?

    Upcycling trash into treasure.

    She provided the silk container (which wasn’t big enough for two jars of bacon fat-soap last time) and this giant Goldfish container (which was actually too big for only one jar of bacon fat this time).   Once you have blended in any fragrances you want to add, pour the liquid soap into the mold and let it cure for 18-24 hours. 

    Soap poured into the soap mold

    Finished soap in my fancy soap mold.

    Once the soap has cured for a day, you can remove the soap from the mold.  Or, if you upcycle an old container like I did, you can just peel the mold off of the soap and discard it.  I forgot to take a picture of the soap before I started cutting it, so I had to push it back together to provide you the illusion of “whole-ness”:  You get the idea.

  7. After you’ve cut your block of soap into bars, all you have to do is wait.  Soap needs to cure for awhile.  At least three weeks is recommended, but the bars will get harder and drier with age. 
Nothin' left to do but wait.

The freshly cut bars biding their time.

So, I haven’t used the bars yet but they cut smoothly and didn’t crumble or get chalky like the last batch so I’m assuming all’s well for now.  They seem to be curing nicely and will be ready for use soon.  Now that I’ve figured out the process, I think I’m ready to start playing with some recipes.  Like maybe this one.

26 Comments

Filed under crafts, frugality, green cleaning, green living

28 Day Challenge Final Results

So, after 28 days, I feel reformed.  Well, maybe I wouldn’t go that far, but my room is clean at least.  Check it out:
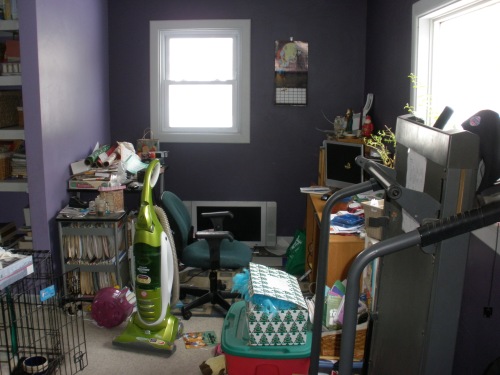
Workout Room?

Before.

And now for the big unveil:

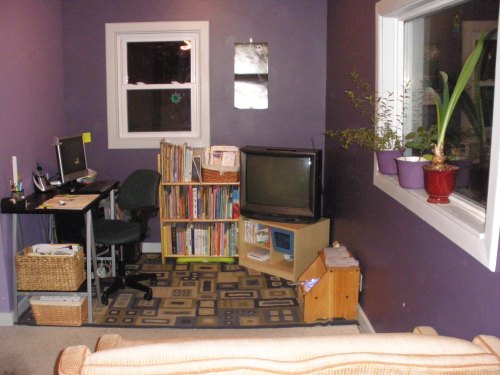
The finished family room.

After

What left?  One of the two bookshelves, one of the two desks, and the treadmill.  Three bags of stuff went to Goodwill.  Two boxes of paper got recycled and a giant bag of paper was shredded to use as worm bedding.  Plus, a box and a bag of books are waiting to go to the used bookstore. 

What’s new?  The loveseat.  It was hanging out in the living room, but it fits much better here.

This shelf has been organized:
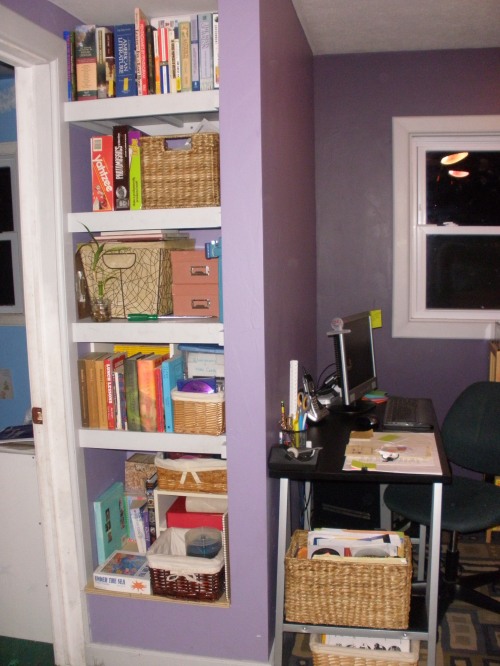
Built in shelf.

This built-in shelf offers a lot of storage.

The “office” has been organized and relocated:
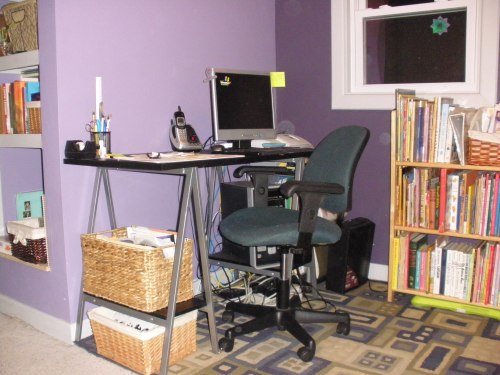
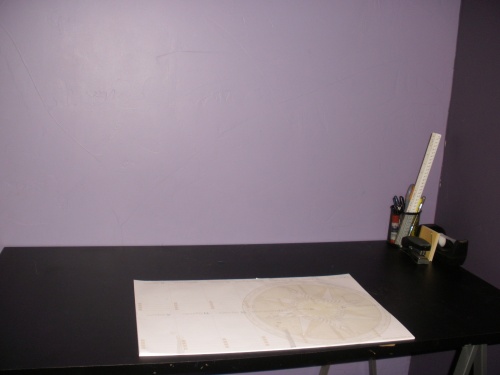
New workspace

The desk is clean and big enough to double as a table for crafts or other projects.

The entertainment center is organized and perfect for the kids and their friends.  There’s even space for a small VCR/DVD player in the console:
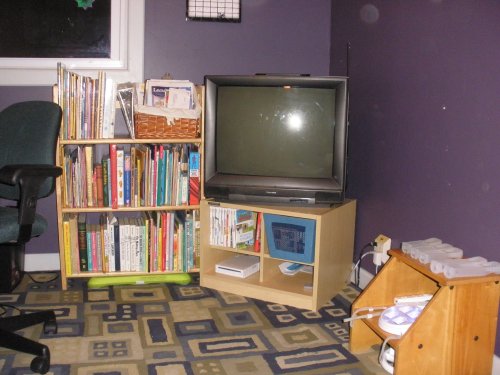
media center

Now the kids have a place to play the Wii with their friends.

The sitting area:
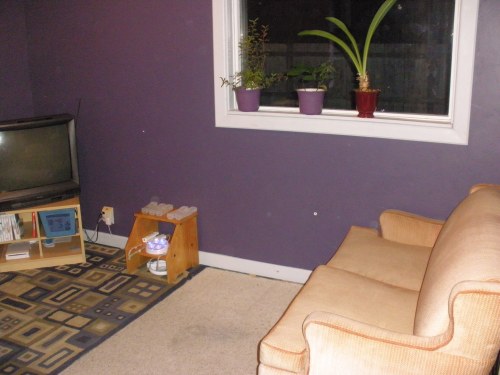
A place to sit and read or play.

A new home for the loveseat I "rescued" from the side of the road.

The room has purpose now, but we needed to keep the dog’s “room” too:
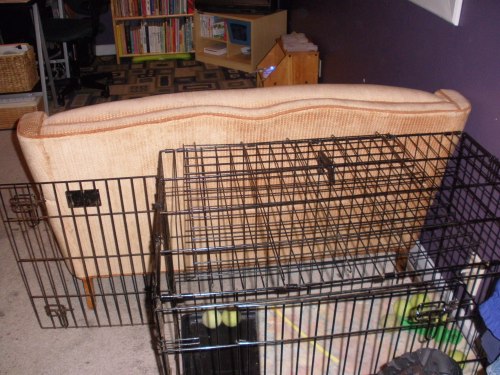
A place for the dog.

The kennel fits nicely behind the loveseat and doesn't detract from the room.

 So, 28 days is supposed to be long enough to learn new habits, to break bad habits and start fresh.  I feel reformed better and ready to conquer another space.  

My room isn’t perfect, but I made the small space work.  I also have to give credit where it’s due.  I didn’t do this all on my own.  Mr. Hippie spent a long time Friday morning organizing and vacuuming, and both the kids helped a little at various stages of the project.  The kids really seem to like their new space, I just hope they like it enough to help maintain it!

And, and update.  As part of the official challenge, I need to answer some questions.  While I kind of got to that in a round-about way in my post, I thought I should clarify a bit. So, here you go:

1.  What was the hardest part of the challenge for you and were you able to overcome it?
The hardest part of this challenge, was finding a new home for all of the “stuff” that had accumulated in the space.  I purged a lot of it. (See #3)  Our house is small and doesn’t have a lot of storage space, so moving it wasn’t an option for most of the stuff. 

2. Tell us what kind of changes/habits you have put into place in order for your area/room to maintain its new order?
I sweep through the room every night and put stuff that doesn’t belong there back in its home.  Keeping Gwen accountable for her junk daily is vital too, because she loves to hang out in the new space!

3. What did you do with the “stuff” you were able to purge out of your newly organized space?
 Tons went to Goodwill.  I took four bags of books to school.  Mountains of papers were recycled.  Some was thrown away.  The bookshelf is being repurposed.  I had originally planned on freecycling it, but it didn’t get picked up so now I’m going to use it in my “root cellar” as storage for canning jars.  Two small shelves got moved into the big storage shelf and one tall shelf got moved into Gwen’s room as “art storage” for her drawing supplies.

 4. What creative storage solutions were you able to introduce in order to create additional space as well as establish some limits and boundaries?
The tall built-in shelf in the room is really deep, so I utilized long baskets and small storage cubes to keep things accesible yet out-of-the way.  It looks tidy, but I can reach everything. 

5. Why do you think you should win this challenge?
I should win the challenge because I turned a completely unusable space in my home into a romm that is filled with life!  The kids want to be there now and I actually enjoy sitting down at the computer to work (and I don’t have to clear a space for my stuff before I sit down at the desk.)

16 Comments

Filed under contest, green cleaning

What’s in Your Vinegar?

Vinegar is a miracle solution.  You can cook with it, clean with it, even rinse your hair with it.  There are aged vinegars, flavored vinegars organic vinegars and thousands of other variations on this ancient product.  Here in Traverse City, we even have a store devoted to the sale of it

All of that said, imagine my surprise at this statement, “You know white vinegar is made of oil, don’t you?”  I didn’t take these words  lightly.  They came from the mouth of a wise friend whose opinions and ideas I take to heart.  I didn’t argue with him, because I didn’t  know, but I couldn’t just let that conversation go.  I had to do more research because, well, I love my white vinegar!

In my searching, I stumbled upon this post at Tiny Choices that discusses vinegar at length.  I won’t rewrite her post here, but it is true.  Most white vinegar is made with by products of the petroleum industry.  The worst part is that this practice is sanctioned by the FDA and other government agencies established to protect us! 

Ok, so chemically, the vinegar is probably the same as “natural” vinegar distilled the old-fashioned way.  But do I want to encourage the use of petroleum by-products in my food?  Do I want to wash my clothes in oil?  Soak my pickles in oil?  Rinse my dishes in oil?  I can’t speak for you, but no,  I don’t. 

The vinegar I was buying didn’t state its source.  Which means that it is pretty likely that it isn’t naturally distilled.   Heinz touts purity on its labels, but Heinz is significantly more expensive than the vinegar I was buying so I had to keep looking.  I checked all the vinegar labels at Meijer: none of them announced their source.

On to the next store.  My neighborhood grocery, Tom’s, is generally a little pricier than Meijer, but with time comes wisdom and I’m beginning to realize all the things that make paying a little extra important even if it cuts into my budget.  Tom’s employees are friendly and cheerful.  They are willing to help you and they still carry out your groceries for you if you want that service.  Many of the employees have been with the company for a long time; that says a lot.  I could go on all day about the merits of local businesses over box-stores, but this is a post about vinegar, no? 

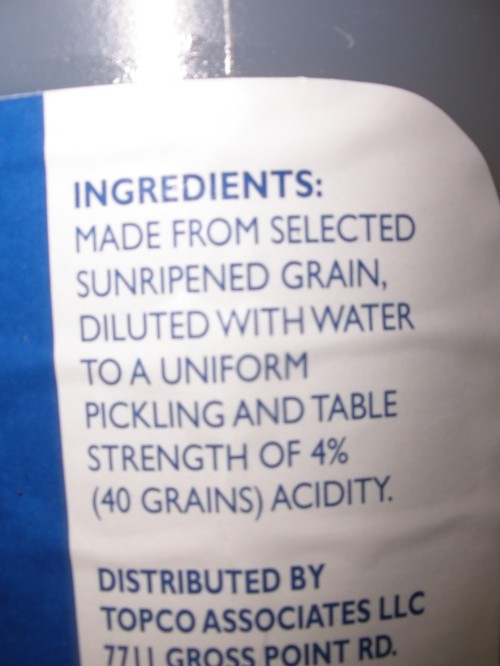
Once again, Tom’s comes through for me.  The store-brand vinegar that they sell comes in a gallon jug, costs $2.29 and has this printed on the label:

distilled white vinegar

Natural vinegar

So, do you know what’s in your vinegar?

9 Comments

Filed under canning, frugality, green cleaning

28 Days Diversion

So, the room is coming around nicely.   I’ve purged a big box and a bag full of recyclables from my space, filled a grocery sack with items to donate to Goodwill, brainstormed some storage ideas with a friend and contemplated several different furniture arrangements. Furniture. It’s just one of those things that you can’t be sure of until you’ve drug all the pieces around and around the room to see how they look. In my head they look one way, but with such a small space, I have to be sure they work before committing to anything.  I’ll have to come back to the furniture.

I’ve also washed and dusted both windows and all the surfaces I’ve uncovered to this point, removed a dead television (that I’m taking to Best Buy to be E-cycled) and vacuumed the exposed carpet.  Despite the progress I’ve made, I still have a long way to go.  The old ‘wooden’ desk has to be removed still and there are many things in and on it that need to find new homes. 

I was feeling pretty good about the room when I got to this point:

Woah!  You can actually see the top of the desk!!

The top of the desk; exposed for the first time in I don't know how long.

The desk was clear and clean.  I couldn’t tell you the last time I saw the top of the desk.  It was inspiring.  Not only because it made me feel like there might actually be hope for the room, but because I suddenly had space to work!  This brings me to the diversion part of the story.  You see, my laptop case  is soo heavy that I can’t stand to carry it around.  Plus, when I bike across town to meetings, I always wish that my laptop was in a backpack.   I’ve been storing fabric swatches for weeks intending to turn them into a backpack for my computer, but haven’t had the space to actually start a project of that size.  Until now.

Here is the finished pack as modelled by my son:

Laptop backpack

My new, custom-made laptop backpack.

I scoured the internet for a pattern, but couldn’t find what I was looking for.  I found laptop sleeve patterns, and laptop envelope patterns, but none of the patterns were for a backpack.   I wish I had a “laptop backpack”  pattern to share with you, but this is more of a protoype.  I had to rework a couple of parts because they didn’t work exactly like I’d planned the first time.  And, I’d put a loop on the back for hanging the pack if I were going to do it again.  Also, I’d figure out a different closure system for the left pocket.  But, the pack does what I need it to do and my son has already put in an order for his pack for camping. 

The pack is quilted and fully lined to protect the computer and to keep it from hurting my back.  The pockets on the back are made from old jeans pant-legs from when Gwen was three or four.  She wore the knees out of the jeans, but the applique was so cute that I couldn’t bear to throw them away.  Sometimes being a packrat pays off.  The water bottle fits snugly in the pocket without any closure, so the right pocket is simply hemmed.  The left pocket is for the computer charger and cords.  I didn’t want them jumping out so I sewed zipper from an old pair of my jeans into the top.  It’s a little awkward, but it works.   The straps came from the same pair of jeans the zipper came out of.  I cut strips out of the length of one of the legs and sewed them onto the pack.  Another of the changes I would make in the future is to sew the straps on before the top flap so that I don’t have to work so hard to hide the raw ends of the straps.  If you look closely at the bottom of the pack, you can see two metal eyelets.  For some reason I thought that would be a good feature.  Keys or something could hang from there.

The side that rests on your back

This is the side of the pack that rests against your back.

For now, the pack will have to do.  Maybe someday, when I have more time, I’ll tear it apart and rework it.  If that happens, I’ll make a pattern and post it for you so that you don’t have to make it up as you go along like I did. 

Homemade Laptop Backpack

My laptop in its new, lightweight, easy-to-carry backpack.

2 Comments

Filed under contest, crafts, green cleaning

5 Down, 23 to Go

As I look around my cluttered computer room, it appears that not much has been done.  I, however, know otherwise. 

  • The Christmas ornaments have been returned to storage as have the rolls of gift wrap and the clear tape that never got returned to the wrap storage container. 
  • The filing cabinent has been cleaned out and the files from the drawer of the old desk have been recycled or refiled into the main cabinent. 
  • The main filing cabinent has been cleared off and wiped down.
  • The window sill has been cleared and cleaned and the plants that “live” there have been trimmed and watered. 
  • I started sifting through papers.  I emptied out a paper grocery sack that was filled mostly with papers I don’t need anymore, cleared out a stack of old magazines, and purged a bunch of old mail.

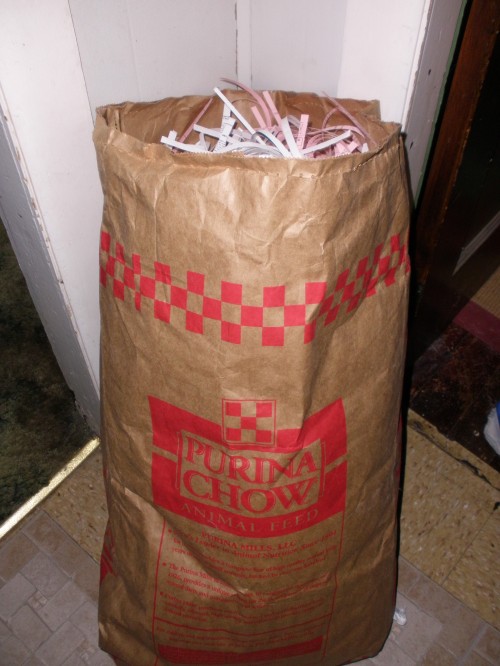
So, I’m well into the purging stage.  I’m not done, but check out this bag full of shredded papers that I’m going to feed to the worms.

old paperwork
50 pounds of paper?

This bag used to hold 50 lbs. of chicken feed.  Now it’s crammed full of shredded papers.  The worms will love all this fresh bedding.  In addition to this bag of “had to shreds”, I also ended up with a box full of paper to recycle.

1 Comment

Filed under contest, green cleaning

28 Days Progress

I have a plan!! 

So, here it is:

1. What do I want the purpose of my room or area to be?
Multimedia/family room.~ Place for tv, video games, and a computer workstation.
2. What do I need in or near the room to serve that purpose?
Entertainment center, seating, proper places for all the junk that’s in the space now.
3. What can I remove from the room?
Christmas leftovers, dead tv taking up floor space, old papers (clean out files and consolidate filing cabinets), kids outgrown books
4. What problems do I see with the room?
Traffic flow is an issue, clutter, too much stuff in the small available space.
5. What organizational tools might solve those problems?
Baskets to organize the remaining items, ???? I’m sure there’s something else, but I haven’t thought of it yet.
6. What habits need to change to solve the organizational problems?
Stuff needs to find a home, things need to get put away, not put down, the kids need to be retrained to keep their stuff in their space, not public spaces.
7. What kind of a budget do I have to create the organized room of my dreams?
Not much, but I’ll spend $50-$100 on storage, etc., if I really need to.  Hopefully I can repurpose other unused/underused items from the house.
8. What kind of a timeline is necessary to organize the room? (28 days!)
9. What is my plan of action?
Box up all the “stuff” that is sitting on/in places it doesn’t belong
Clean out files/desks and recycle or refile everything to conserve space
Get rid of a desk
Eliminate one or more bookshelves

Now, following through on the plan will be an important component of the organizing if I am going to actually get the room cleaned up.  The Christmas tree has been gone since before the new year, but for some reason I hadn’t gotten around to putting the boxes of ornaments away.  (Nor had anyone else stepped up to the job.)  They are all organized now and ready to be removed from the room.  I know, it’s a baby step, but hey, it IS a step.

Leave a comment

Filed under contest, green cleaning