Tag Archives: yogurt

Dark Days Dinner: Buffalo Stroganoff with Rosemary and Morels over Rosemary Pasta

Stroganoff is a classic dish.  I don’t think I have ever followed a recipe for it the way I was supposed to.  Some things require recipes.  Baking for example is science.  You can’t mess with chemistry and have it work out the same every time.  Sauces are different.  You can play with the seasonings, adjust the thickener or the cook time and it’s all good.  So, as usual my “recipe” is more of a set of guidelines to follow.

Buffalo Stroganoff with Rosemary and Morels over Homemade Pasta

Buffalo Stroganoff with Morels

  • Cube a buffalo sirloin steak (8-10 oz.) and place the chunks in a non-reactive dish.  Cover the steak chunks with plain yogurt (about a cup and a half, but enough to cover all the pieces)  Allow the meat to tenderize for 4-6 hours.
  • Heat a cup of stock (I used homemade chicken, but beef would probably be better.)  Add 8-10 dried morel mushrooms to the stock and allow to soak while meat tenderizes.
  • Sautee a small, diced onion and 2-3 cloves of minced garlic in hot oil.
  • Add sirloin to skillet (reserve yogurt) and sautee until browned.  Add salt and pepper to taste and about a teaspoon of minced fresh rosemary.
  • Roughly chop morels and add them to the pan (reserve stock).
  • Sautee until heated through and add enough flour to thoroughly coat meat and mushrooms. (Probably about a half cup.)
  • Turn heat to high and add stock reserved from mushrooms stirring continuously to avoid clumping.
  • Reduce heat and add reserved yogurt.
  • Add a cup of heavy cream and simmer until thickened.  Add another half cup or so of yogurt to tang up the sauce.
  • Serve over hot egg noodles or homemade pasta.  I served ours on homemade rosemary garlic pasta.

4 Comments

Filed under Dark Days, food

Dark Days Week 19

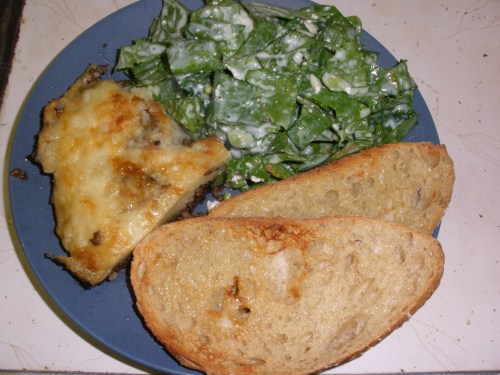
Well, the true “Dark Days” are officially over with the arrival of spring, but the other challenge participants and I are playing along for the rest of the month.  This week I made one of my husband’s favorites, a modified Shepherd’s Pie. 

 I had loads of local onion leaves left from processing all the onions for the Can Jam challenge last week, so I started by chopping the scallion-y leaves  into a skillet with a drizzle of olive oil.  I added a couple of cloves of crushed garlic from Providence Farms, a pound of ground beef from Olds’ Farm, a little salt & pepper and sauteed the whole mixture until the meat was cooked through.

Meanwhile in a pot of boiling salted water, I cooked four or five redskin potatoes from Westmaas Farms.  When the potatoes were cooked fully I mashed them, skins and all, with some homemade feta cheese

Drain the extra fat from the cooked ground beef.  Scoop the feta-mashed potatoes out of their pan and spread them onto the beef.  To make the whole mess extra tasty, grate some Black Star Farms Raclette on top before baking.  Everything is fully cooked so you only need to bake the pie long enough for it to become golden and delicious.  Or, you can preassemble pies and bake them another day when you need a quick meal and don’t have time to cook.

Meat and potato pie

Fresh from the oven.

I love this dinner because it is simple, I almost always have all the ingredients I need for it in the house, and everyone in the family will eat some variation of it.  Sometimes I add corn kernels or other veggies to the ground beef, but it is good without them. 

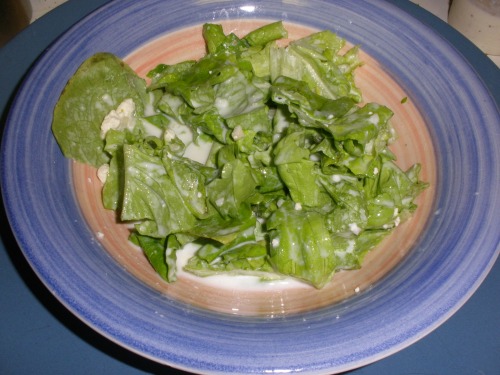
To round out our meal I made a salad with local romaine lettuce, more onion greens and the yogurt-feta dressing I made last week but didn’t eat because I was out of lettuce. 

Last Saturday was “Shop Your Community Day” so while I was wandering around the Commons after my trip to the Farmers’ Market, I popped in to Pleasanton Bread and picked up a loaf of their wood-fired brick oven whole wheat bread.  It was delicious toasted with this simple meal.

Quick & Delicious Dinner

A wintry meal for a spring day.

4 Comments

Filed under Dark Days, food

Dark Days Week Thirteen?? (or, No More Roosters in the Henhouse)

This week was an incredibly busy week for me. 

To begin the week I had a late meeting Monday evening after school.  On top of that, the second fundraiser for the Family Wisdom Conference was Thursday night and I had to do a lot of things to prepare for it.  I had to collect all the silent auction items from my friends that had agreed to donate items (A handmade basket, Barefoot Books, and abi*bags) and finish building the worm bin that I agreed to donate.  Then, I had to bake cookies.  I made delicious marmalade thumbprints using my homemade blood orange marmalade.  I also baked chocolate chip cookies and hand rolled truffles until all hours of the night Wednesday. 

After preparing for the fund raiser I got to actually attend it!  The evening was wonderful, we had a pretty good turn out and we raised money to cover the expenses of the upcoming conference, but it meant spending all night Thursday out of the house. 

Plus I had a sledding birthday party Friday evening with a meeting for the Road Rally scheduled right in the middle of it. 

Knowing that I had to attend all these functions and complete all these tasks, I set out to cook my Dark Days Dinner early in the week.  I started out with a local sirloin and some potatoes from my “root cellar”.  I whipped up a batch of homemade feta-yogurt dressing for my salad of local butter lettuce and then. . . I burned the potatoes beyond recognition.  Boiled potatoes mind you.  I boiled the pot dry and then waited for the smell of burning potatoes to signal the downfall of my dinner.  Steak and salad alone do not a dinner make.  So, I had to pull a bag of gnocchi out of the cupboard to round out our meal.  Mostly local?  Yes.  Dark Days local?  No.

So yesterday I started over. 

I started my journey as an urban chicken farmer in September.  If you’ve been following me since then you are aware that three of my four chicks turned out to be roosters.  The City doesn’t allow roosters in town so something had to be done.  Last week I dropped off the roos at Olds Farm to be processed.  We picked them up cleaned and bagged the next day and last night I pulled one of them from the freezer and roasted him for dinner. 

Our official Dark Days Dinner this week consisted of our homegrown rooster roasted with onions, celeriac and garlic from Providence Farms, butternut squash also from Providence, corn on the cob from the Farmers’ Market via the freezer,

Dinner was much more succesful the second time around.

The "Official" Dark Days Meal for the week.

butter lettuce salad with homemade yogurt-feta dressing

Local lettuce with homemade dressing.

Local greens with my old standby dressing: Homemade feta, homeade yogurt and local garlic

 and homemade biscuits from locally grown spelt flour. 

Local organic spelt flour makes yummy biscuits!

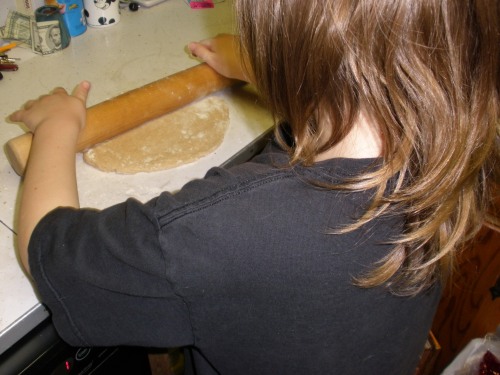
Dylan helps me roll the biscuits for our Dark Dinner.

Dylan helped me roll out the biscuits and I even drizzled a little honey from Millie Hathaway’s bees on mine.  Yum!

13 Comments

Filed under Dark Days, food, urban chickens

Dark Days (What Week are we on now, Anyway?)

Roast Chicken with the Trimmin's


As usual I’m rushing around trying to finish all the things I want to get done before the weekend is over, but I am finishing them.  Including this post. 

Dinner this week was a delicious roast chicken from Olds’ farm in Mesick with salad, homemade bread and corn on the cob.  The salad was chopped, cold-frame romaine from the Farmers’ Market with my usual standby dressing: homemade yogurt-feta with garlic from Providence Farms.  

The kids have been pestering me to have corn on the cob for a while.  We put a bushel in the freezer in August, but  I didn’t have space to freeze any more so I’ve been trying to ration it and I don’t let them eat it whenever they want it; I’m afraid we’ll run out.  

I’ve been begging the hubby for a bigger freezer since summer.  I think he’s almost ready to give in.  If  When he does I’ll have room for twice as much corn and the kids can eat it (almost) whenever they want it. 

The bread was the usual and came from a batch of dough I started earlier in the week.

Great Lakes Tea & Spice

An herbal tea as relaxing as the Northern Lights.

My mother-in-law bought me some delicious tea from Great Lakes Tea and Spice for Christmas.  I’ve been drinking it nonstop since she gave it to me; it is so delicious!  I had some with dinner, but it is too good to share.

This picture isn’t great, but you can check the tea out at Great Lakes Tea and Spice.

1 Comment

Filed under food

Dairy Queen Part 2 (Or, How to Make Yogurt)

What is this?

Repurposed beverage cooler

What is this???  Don’t know?  Read on.  I love when I can reuse or repurpose old things. I almost took this beverage cooler to Goodwill on several different occasions.  It was actually in a donation bag when I rescued it for its new life as a . . .  yogurt warmer.  I don’t know about your house, but mine goes through a lot of yogurt.  I’m ashamed to admit that back in the days when we were a more “disposable” household, we went through Go-gurt by the gallons.  I’ve long since stopped buying Go-gurt for the kids because of both its waste factor and the fact that it is made of corn, coloring and chemicals.  However, Hubby was a hold-out on the Go-gurt.  He packs his lunch every day and appreciated the convenience factor of the stuff.  I finally won that battle when his doctor explained to him that he may as well eat sugar as Go-gurt since it has little or no actual nutritive value and is mostly sugar, food coloring and artificial flavoring with enough yogurt added in so that they can call it yogurt.  

Because we eat so much yogurt, this summer I started making my own.  It was actually a first step on my road to cheese, but it is so easy and economical that I can’t imagine stopping now.  If you google yogurt making, you will find lots of different recipes; some even have videos.  I’ve been making yogurt regularly enough that I have it down to a science: 

Quart Jar of Milk
Quart of milk ready to heat.

First, fill a quart jar with milk.  You can use soy milk if you prefer.  Put the jar of milk in the microwave and heat it until it reaches 110°.  (My microwave takes just over three minutes to do this.)  Many recipes tell you to heat the milk to 180° to scald it and then cool it to 110°.  I did that when I first started making yogurt, but I don’t anymore.  If you’re a purist and you prefer, you can heat the milk on the stove, but it takes a longer time and you have to watch the milk carefully and stir it often to keep it from scorching to the bottom of the pan.  Plus, you have to wash an extra pan.

Taking the temperature of the yogurt

Wait until the milk reaches about 110°

The milk may not be exactly 110° after the initial time in the microwave.  Heat it a little longer if it’s necessary.  If you have accidentally heated the milk to more than 110° or purposely heated it to 180°, you will need to wait for the milk to cool.  If you heated your milk significantly past 110°, putting the jar in a bath of cool water will help it reach the correct temperature faster.  Whether you are heating or cooling the milk, monitor the temperature fairly closely unless you like having to reheat your milk over and over again to try and get the proper temperature. The bacteria that turn milk into tasty yogurt thrive at about 110°, so keeping the temperature as close to that as possible will help ensure your success.

last of the old yogurt

The last tablespoon or so of yogurt from my last batch.

Once you’ve gotten the yogurt within a degree or two of 110°, get out your old jar of yogurt, or if this is your first batch, you can use a tablespoon of PLAIN store-bought yogurt.  Even if you are making soy yogurt, you will need to use cow yogurt as a starter for your first batch.  You can dump (or spoon) the yogurt into the waiting jar of warm milk, but I like to dump the warm milk into the jar with the old yogurt in it to rinse all the yogurt out of the jar without wasting any.  After several batches of yogurt, you may need to buy a new plain yogurt to use as a starter.  I haven’t had to buy a new starter, but I do every once in a while.

warm milk inoculated with yogurt bacteria

Warm milk dumped into the jar from the previous batch.

After I’ve dumped the milk into my old yogurt, I like to dump it back into the clean, new jar.  I feel like it helps to keep things more sanitary, but it is probably not necessary. Now that you have a jar full of inoculated warm milk, tightly screw a cap on the jar.  If you used a standard-mouthed jar you can either use a canning lid and ring or a standard-sized top from a commercially-made jam or pasta sauce with the same size lid.  Either way, make sure the lid is on securely so that water won’t seep into your yogurt in the next step. 

inoculated warm milk

The lid is on securely

Remember the beverage cooler from the start of the post?  It’s time to get that thing out.  My old cooler is the perfect size to hold a quart jar of yogurt.  Fill the cooler about half full of 110° water.  It can be a little warmer, but I wouldn’t recommend water any cooler than that.  You can warm water in the microwave or a kettle, but I’ve found if I turn the hot water on in my kitchen and let it run for a moment until it heats up, it is almost exactly 110°, so I just fill mine with hot tap water. 

yogurt in warmer

Yogurt in warmer submerged in warm water

Over the sink, set the jar into the warm water.  If you don’t do it over the sink, water will overflow all over your countertops when you submerge the jar of milk.  The jar should be completely under the water and the water should be level with the top of the jug.  This keeps the water warmer, which keeps the yogurt warmer.  Screw the lid onto the cooler and let it rest for about seven hours.  I generally make the yogurt at bedtime and take it out in the morning, but it can be made in the morning if you have time to deal with it. 

I’d show you the finished jar of yogurt, but it looks just like the jar of milk except thicker.   So, instead I’ll show you what I do with the yogurt to make it convenient and portable.  These cute little plastic cups are available in the canning department of a store near you.  They’re designed to be used in the freezer for jams, but are perfect for single serving yogurt.  They actually come in packs of five for around three dollars, but one of mine seems to have “magically” disappeared.  You can make the cups up one at a time but I like to make them all up at once to make packing lunch easier.  Spoon a little jam, jelly, honey, pie filling or applesauce into the bottom of each cup.  I used apple jelly, but I really like peach and cherry.  Scoop yogurt in on top of the spread.  Make sure you leave a little “head room” in each jar and screw the lids onto your cups and you’re finished. 

Freezer jars

Just like disposable yogurt cups from the store only reuseable!

Making your own yogurt may seem intimidating, but you have nothing to fear.  Homemade yogurt saves money and eliminates a great deal of garbage that is involved in pre-packaged yogurt.  A quart of premade yogurt costs over $3, more if you buy individual containers or organic yogurt, and even more than that if you buy locally made yogurt (if it’s available where you live).  When you make cheese, you have a lot of whey left over.  With yogurt, there is no waste, so homemade yogurt costs whatever your paid for your milk.  If you pay $3.59 a gallon for milk, you will get four quarts of yogurt for that $3.59.  Even if you buy organic or local milk, you are saving money on your yogurt.  Plus, homemade yogurt is delicious!

6 Comments

Filed under food, frugality, green living

Dairy Queen

Feta brined and ready for the fridge.


As a school teacher, it is easy to settle into the lazy days of summer.  For three months I hike, run, garden, cook, walk to the Farmers’ Market, take my kids to the beach and actually read grown-up type books that I enjoy.  This summer I also started canning again after a long hiatus and started making my own cheese and yogurt.  I’d make a new batch of cheese every week.  I started with mozzarella, tried feta and then moved on to hard cheeses.  After a few batches, my husband even built me a cheese press.  While each cheese has its merits, feta is by far my favorite.  I have always loved feta, so when I found out how easy it was to make,  I became even more enamored by its crumbly goodness.  

But, summer inevitably comes to an end.  When September rolled around this year, I started to panic.  Not only did I have to go back to work, but I had a class that I had to complete homework for and attend every week.  How would I keep cooking good, homemade food?  Where would I find the time to can? How would I go to the Farmers’ Market, pick berries, bake bread or make yogurt and cheese???  My life as I knew it came to a screeching halt.  I didn’t know how I was going to manage all the things I needed to do.  

At one point, I was so distraught that I would come home from work and cry to my husband.  I wanted to run away and live on a farm off the grid.  None of this had anything to do with the actual work that I do every day; I love my job.  I love working with kids and knowing that I’m making a difference.  My distress was all about my lack of time.  I needed to adjust and I didn’t know how.  

Cordon Bleu and Parmesan

Better than Zoloft.


While I’ve wanted chickens ever since I read “Animal, Vegetable, Miracle” last summer, part of me needed them after school started.  I researched and researched chickens.  I learned about different breeds.  I learned about how many eggs chickens lay and what color they are.  I researched ordinances  and the legality of chickens here in the city.  I spent hours researching chicken coops and chicken care.   Getting chickens was my way of running away and living on a farm without having to really run away.  Chickens weren’t a step away from the life I was living, but they were a step towards the life I want to be living.  The impact those girls had on my mental health still amazes me.  While they didn’t create any more time for me, they did remind me that there were things I could do to have the life I want.  

Where's the coffee?

Even the undead need their exercise.


Since the girls arrived in September I’ve started adding elements of my “summer life” back into my real life.  I hike three to five days a week.  I haven’t managed to keep running regularly but I did run the Traverse City Zombie run and I’m signed up to do the Turkey Trot 5k Thanksgiving morning.  I haven’t done much in the garden, but I planted a row of blueberry plants and I’ve got raspberries, grapes and soapwort waiting to go into the ground.   I may not cook a homemade “slow” dinner seven nights a week, but I try to cook a “real” dinner for my family most nights and still try to eat as much local food as I can.  I cook vats of soup on the weekends to freeze for lunches.  I even signed up for the “Dark Days” challenge to try to cook a completely local meal at least once a week.   I managed to can some tomatoes, jam and jelly and found time to can (and pick) countless apples.  I’ve made it to the Farmers’ Market every Saturday morning and a couple of Friday evenings even though I couldn’t go to the Wednesday morning markets in September.  I didn’t make it out often to pick berries, but I did get out once to get a couple quarts of blueberries for the freezer.  I’m not making my own sandwich bread, but I have been making homemade loaves three or four nights a week.  

Homemade yogurt


 It took a while before I decided that I really did have the time to make yogurt, but in hindsight, that was silly.  Yogurt is so easy; I make a quart or two a week now.  Cheese however, is a completely different story.  Cheese isn’t difficult, but it is intimidating and it takes a long time to make.  

In my mind, I just didn’t feel like I could spend that much time on one project when there are so many other things I could and should do with the time cheese takes.  So what do you do when you go to the grocery store, purchase two gallons of milk and return home to find that you already have two-and-a-half gallons of milk, in your refrigerator??  You do what anyone else would do; start a batch of cheese and a quart of yogurt.  

When I got home from the store with The Milk,  I put away the groceries and started a quart of yogurt.  That barely made a dent; I still had over four gallons of milk left in the fridge.  It was time to make cheese.  Although I’ve been wanting to make cheese for a while (and I finished the last of my feta on the first Dark Days dinner) this wasn’t a cheese made of desire, but one of necessity.  

I got out the giant pot and poured in two gallons of milk.  I turned on the stove and monitored the temperature until it reached 90°.  I put the pot in an ice bath in the kitchen sink and let it cool back down to 86°.  When the milk reached 86° I whisked two tablespoons of Brown Cow plain yogurt into it and let it rest for an hour.  After the milk rested for an hour I mixed 40 drops of vegetable rennet into the milk and left it alone until the next day.  Just like that I had eliminated half the milk in my fridge! 

feta curds

Draining the feta curds.


The next day the milk had gelled and the whey had separated from the cheese curd.  I cut the curds with my long bread knife, let them rest for 15 minutes and then drained the whey from the curds.  I hung the curds to drip for the rest of the day and put them in the cheese press.  

feta hanging

Hanging the cheese to separate the whey from the curds.


Today I removed the feta from the press, cut it into chunks and put them in mason jars filled with brined whey.  In another day or two I’ll be able to enjoy my own, homemade feta cheese again.  While it takes some time to make cheese from start to finish, it really isn’t that much work.  The recipe is from Dr. Fankhauser at the University of Cincinnati. 

The amazing thing about making cheese is how much whey you have left over when you’re done.  Two gallons of milk yields about six cups of feta cheese and a gallon and a half of whey.  What do you do with all that whey when you’re done making cheese??  Stay tuned to find out! 

Gallon of whey

What do you do with all the whey once the cheese is made?

5 Comments

Filed under food, frugality, urban chickens