Tag Archives: bread

Egg-less Banana Bread

First, if you’ve never been to this blog before, let me make one thing perfectly clear. I am not a vegan or a vegetarian. I eat eggs. I raise chickens just so that I can have good, quality eggs at my disposal. However, we’re smack in the middle of winter. Even worse, we’re smack in the middle of some awful polar vortex that made its way here from the Arctic and won’t leave. If you’re not familiar with chickens, you probably don’t know that when the daylight starts to wane, so does their egg production. Add to that the fact the we’re down to three hens and Luna’s production has slowed anyway as she reaches her fourth spring. We haven’t had an egg here since October!!
So, I’ve been forced to go to the co-op or farmers’ market to keep eggs in the house. Which is fine, but um, we’re trying not to spend all our money on groceries and egg and sausage biscuit sandwiches are on this week’s dinner menu and I didn’t want to use them all up and have to buy more.

My pig!So, the bunch of bananas getting browner by the day was screaming at me. I could have peeled the bananas and put them into one of the freezers, but I’m trying to empty them enough to make space for the hog we’re getting from Quartz Farm as soon as he’s big enough.

Banana bread is the best way I know to use up sad, old bananas. All my recipes called for eggs. I Googled egg-less banana bread and got 2 or 3 different recipes that were all basically the same. I then searched for egg substitutes. My search returned the usual, “applesauce, banana, flax seed or oil”.

I ran through the options in my mind and decided against all of them because: I’m already putting 6 bananas in the recipe, I don’t think I should substitute one for the eggs; banana bread already has a lot of butter or oil, so I didn’t want to add any more; all my applesauce is flavored and I don’t want to add any more fruit to my bread; and finally, I don’t have any flax seed. But, there was another egg substitute that intrigued me, for each egg, mix:

2 tablespoons water
1 teaspoon oil
2 teaspoons baking powder

I have oil, water and baking powder in my house, so I decided to give it a go.

Banana bread recipes are essentially the same. Oh, of course you can add chocolate chips, or sprinkle some sort of topping on your loaves  but they all boil down to the same thing. Bananas, flour, sugar and a few other key  ingredients in similar proportions across the board. Well, except for that whole egg thing.

Have I mentioned that I’m a math geek? Sometimes when I can’t decide on which recipe to use, I like to play the game of averages. Do you remember averages from school? Or maybe, like me, you actually still use them in your adult life? Add up the values of a given thing and then divide by the number of given things you started with. It’s pretty easy actually, but the nerd in me loves it.

(If you’re screaming in your head, “Just get to the recipe already!” Click here for a printable version or scroll down to the pictures and please accept my apology for rambling.)

I start with a table. I list all the ingredients down the side and then across the rows I write in the volume of that ingredient in the various recipes. Once the table is complete, I calculate the average amount of each ingredient, round it to the nearest measurable amount and then use that number as the amount in my recipe.
For example, sugar. I had six recipes. The sugar called for in those six recipes was: 1 cup, 1 cup, 1 cup, 2/3 cup, 3/4 cup and 2/3 cup. I added all the sugar amounts together and divided by six to get 0.74 cups and then rounded it up to 3/4. Sound tedious? It actually brings me a great deal of joy that I can’t quite explain. Oooh! Oooh! Plus, I doubled the recipe; more math!

When I was all done with the math for my recipe, I added in a few ingredients of my own. One of my original recipes called for milk, one for sour cream, and one for cream cheese. When those ingredients were averaged in, they didn’t account for much of the total recipe, so they weren’t included. Except, I happened to have a half a container of sour cream in the fridge. I myself am not a fan of sour cream, but I needed it for a recipe so I decided to go ahead and add sour cream after all so that I could use it up before it spoiled. And, I added WAY more vanilla than the averages called for. Plus, cinnamon. It wasn’t in any of the recipes and I just felt like putting it in.

The batter was really thick and I thought I was going to end up with a dry bread (which I hate) but I’m quite pleased with how the loaf came out. It was very moist, had a nice flavor and if I have sour cream in the refrigerator again I could probably be persuaded to make another batch.

When everything was said and done, I ended up with this:Yummy homemade banana bread.

To make Egg-less Banana bread,
preheat your oven to 350°.

Add butter and brown sugar to the mixing bowl.

Butter and sugar

Cream butter and sugar together.Creamed together butter and sugar.

Add one egg or one “egg”.

egg substitute

2 T. water
1 t. oil
2 t. baking powder mixed together

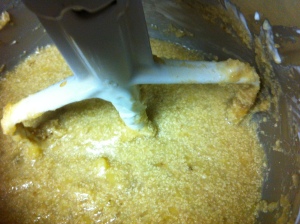
Mix well and add sour cream and vanilla. Mix until combined and add bananas. My math said 5 1/2 but I had 6 so I used all of them. I also didn’t mash the bananas before I put them in; I broke chunks off into the mixer and then just beat the snot out of them until they looked like this.All mixed up
Measure the dry ingredients into a separate bowl or 1 quart measuring cup.Flour and spices
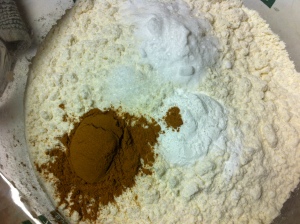
Add the dry ingredients to the wet ingredients in stages, mixing after each addition.

Grease a 9″ x 13″ baking dish or two loaf pans. Spread the batter into your pan(s) and bake at 350° for 45-55 minutes. Bread is finished when toothpick inserted in the center comes out clean.

Click here for printable version.

Egg-less Banana Bread

Makes 2 loaves or a 9” x 13” pan

Preheat oven to 350°

  • 1 cup butter

  • 1 ½ cup brown sugar

  • 1 “egg” ~ whisk together:

    • 2 T. water

    • 1 t. oil

    • 2 t. baking powder

  • 1 cup sour cream

  • 1 t. vanilla

  • 6 bananas, mashed

  • 3 1/3 cup flour

  • 1 t. baking powder

  • 1 t. baking soda

  • 1/3 t. salt

  • 1 T. cinnamon

Cream butter and sugar. Add egg substitute or egg. Mix well. Add sour cream and vanilla and blend again. Add bananas and mix well.

In a separate container combine dry ingredients. Add a little at a time, mixing after each addition.

Grease a 9” x 13” casserole or two loaf pans.

Pour batter into pan(s). Batter will be quite thick and may require spreading with a spatula.

Bake in 350° oven 45-55 minutes.

Bread is finished when toothpick inserted in center comes out clean.

Leave a comment

Filed under food

Cinnamon Caramel Monkey Bread

There’s a little restaurant in town that serves monkey bread and my family loves the stuff!

Finished Monkey BreadI’ve noticed a lot of recipes on the internet lately for the pull-apart cinnamon bread many people call monkey bread. Apple Monkey Bread, Blueberry Monkey Bread, even Crock Pot Monkey Bread. With all the buzz, I decided to give it a try.

Before I started, I looked at a lot of recipes. Like this one for Crock Pot, Apple Monkey Bread. This was the leading contender, but I decided I didn’t want to wait 2 1/2 hours for it to cook. So, I looked around some more and found these oven-baked recipes for Blueberry Monkey Bread and Cinnamon Pull-Apart Bread. I was leaning toward the Cinnamon Pull-Apart bread, but didn’t want to make actual bread before starting the recipe. For a minute I contemplated using the dough I had in the refrigerator, but wasn’t sure how the 5-minutes dough would hold up. The dough is pretty thin and I didn’t think it would hold its shape.

The other two recipes call for canned biscuits. I neither had nor cared to purchase any canned biscuits to make my bread, so I decided to whip up some biscuit dough to use. My biscuit recipe only makes 10 biscuits, so I had to double it to make sure I had enough biscuits to fill my chosen pan.

Flour, sugar, salt, tartar, baking powderStart by combining flour, baking powder, sugar, cream of tartar and salt. I measured the flour into this measuring cup and then just added the remaining ingredients on top before dumping the whole mess into my mixer bowl.

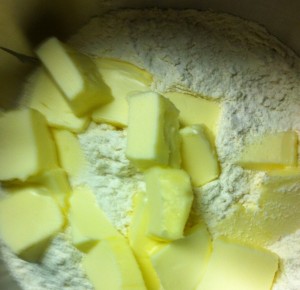
Mmm. Butter.Cut the butter into chunks and add to dry ingredients.

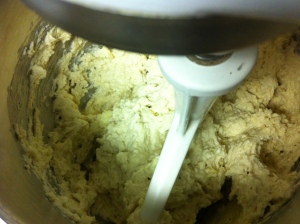
Butter blended into dry ingredients.“Cut” the butter into the dry ingredients until the mixture resembles coarse crumbs. You can do this by hand with a pastry cutter, a whisk or even a fork. I opted to use the whisk attachment on my Kitchen Aid mixer. ‘Cause I love it.

Milk in the well.Make a well in the dry ingredients and add the milk all at once.  I used unsweetened almond. 

Mix until blended.Using a wooden spoon, mix the wet ingredients until just blended. I used the paddle attachment on my mixer.

biscuit doughKnead the dough 10-12 times on a lightly floured surface and then flatten it out. If you were making biscuits, you could roll them out to a half an inch and then cut them, but since I was just going to make balls of dough I opted to just pinch off balls of dough that were about 1″.

Grease a baking dish. I would recommend a 9″ x 13″ pan, but I actually used a deep, 4″ x 8″ pan.

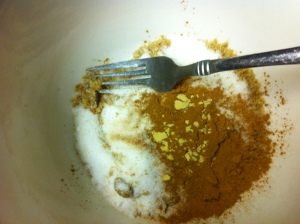
Sugar and Spice and everything nice.In a microwave-safe bowl, combine sugar, brown sugar, cinnamon and ginger. Mix together and sprinkle two-ish tablespoons into the bottom of the greased baking dish. Pull or cut balls of dough from your flattened biscuits, roll them in the sugar mixture and spread them out into the baking dish. When you are finished rolling all the biscuit pieces in sugar, there will probably be a little left. I left it in the bowl and added the butter and cider to the bowl.

Smirnoff Caramel KissedMicrowave the bowl until the butter is melted. Remove the bowl from the microwave and add the caramel vodka. The little bit of alcohol in this small amount of vodka will cook out, but if you don’t like cooking with alcohol or don’t have any flavored vodka, you can use vanilla instead. Stir to combine and drizzle the liquid mixture over the pan of cinnamon-sugar covered dough balls.

Ready for the oven.Place the pan in a preheated 350 degree oven for 30-40 minutes. Because I used a deeper dish, my bread took the whole 40 minutes to finish.

Cinnamon Pull-apart bread.

Fresh from the oven!

Cinnamon Caramel Monkey Bread

Biscuits

  • 4 cups flour
  • 2 T. baking powder
  • 1 T. sugar
  • 1 t. cream of tartar
  • 1/2 t. salt
  • 1 cup (2 sticks) butter
  • 1 1/2 cup milk

Topping

  • 2/3 cup brown sugar
  • 1/3 cup sugar
  • 1 T. cinnamon
  • 1 pinch ground ginger
  • 1/4 cup (1/2 stick) butter
  • 1/6 cup apple cider
  • 1 T. caramel kissed vodka (or vanilla if you prefer)

In a bowl stir together flour, baking powder, sugar, cream of tartar and salt.
I used the whisk on my Kitchen Aid mixer to cut the butter into the dry ingredients, but you can do it by hand with a whisk or dough cutter until the mixture resembles coarse crumbs.
Make a well in the center of the dry ingredients. Add milk all at once. With a spoon (or the paddle attachment of your mixer), stir just until the ingredients are blended.
On a lightly floured surface, knead the dough 10-12 times and pat it flat.

2 Comments

Filed under food

2013~ A Year in Review

2013 was a busy year. I didn’t blog much, but I did get a lot done.

I have a daughter that is now a senior in high school and a son that left elementary to move up to the big leagues of middle school. Hubby got (and rejected) two job offers. One was definitely not a better job. The other would have been a pay raise but would have caused a ridiculous amount of stress for Mr. Hippie. Mr. Hippie’s ulcerative colitis doesn’t do well with stress, so although I still pine for the extra income that would make our fiscal lives easier, I am grateful for his time with our family and for his health.

Will 2014 be The Year of My Blog? I don’t know the future, but I hear that the road to Hell is paved with good intentions. Regardless of what 2014 brings, I’m leaving 2013 with a bang!

The top posts always surprise me a little, but it helps me understand what people actually want to read! Apparently the movement toward healthier, greener cleaning hasn’t lost steam and people still love animals!

Coming in at number one:

Vinegar and oil(s)Homemade Fabric Softener

housing for two rabbits

Home to our breeding pair.

Building a Rabbit Hutch

Finished loaf cooled, sliced and ready to eat.

Freshly baked bread in five minutes?

Crusty Round Loaves of Homemade Bread

Homemade Laundry Detergent

Homemade Laundry Detergent

Soap after the mold has been removed.

How I Made Homemade Soap (and Didn’t Screw it up)

Some of the finished treats.

Homemade Dog Biscuits

Supplies needed to make your own.

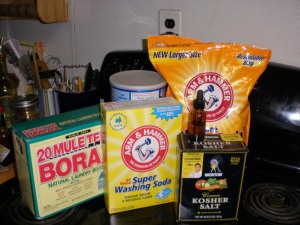
Homemade Dishwasher Detergent

Sink Scrub

Homemade Scouring Powder

Chicken Tractor

Chicken Run

Pinot Jelly

Pinot Noir Jam

Thanks for sticking around to hear what I had to say even when I didn’t have much to talk about!

Leave a comment

Filed under green cleaning, Miscellaneous

In Search of the Perfect Brioche

When I was working for 9 Bean Rows in trade for my CSA share, I became acquainted with brioche. If you’re not familiar, it is a flaky, buttery egg bread. When toasted and slathered with raspberry jelly it easily passes for a jelly donut and is probably just as bad for your diet.

Tired of spending $5 a loaf for the stuff, I decided to make it myself. I bake. It can’t be too difficult, right? Wrong. I tried to make a loaf and it turned out horribly. Dry. Almost crumbly. It was so bad that I didn’t even note which recipe I used. It was then that my quest for a decent recipe began.

I’m still working my way through recipes, but I thought I should keep you posted in case you, like me, are on a quest for The Perfect Brioche. This recipe wasn’t bad. I would actually consider trying it again on a day when I had more time because I rushed it a little and that could have affected the final product. The texture was right, but it was dry. How can ANYTHING with almost a pound of butter in it be dry??  As a dinner roll, the bread was okay. It fared much better as toast, but its real redeeming quality was that it made the best french toast ever. Another plus? This recipe doesn’t require the shaping of loaves, you just dump the dough into a pan or muffin tins and let it rise.

This recipe is from Emeril Lagasse’s Lousiana Real and Rustic.

Brioche

Starter
3 envelopes (6 3/4 tsp.) yeast
1/2 C. warm milk (about 110°)
1 C. flour

Combine the yeast and milk.
Stir to dissolve the yeast.
Add flour; mix well.
Let sit in a warm, draft-free place 2 hours.

Dough

4 C. flour
6 eggs
1/2 C. warm water (about 110°)
3 T. sugar
2 t. salt
3 sticks butter at room temperature plus extra for greasing pans
1 egg yolk, beaten

  1. Put 2 cups of flour into a large mixing bowl. Add 4 eggs, one at a time beating thorougly with a wooden spoon after each.
  2. Add water, sugar and salt. Mix well.
  3. Add three sticks of butter and mix in with your hands until it is well blended.
  4. Add remaining two eggs and mix well.
  5. Add remaining flour. Mix well and break up any clumps of flour.
  6. Knead the starter into the dough with your hands. Continue kneading until well mixed; about 5 minutes. The dough will be sticky and moist.
  7. Cover with a clean damp cloth and let rise in a warm, draft-free place 2 hours.
  8. Butter two 9″ x 5″ x 3″ loaf pans or two standard 12-muffin pans.
  9. Punch dough down lightly and divide into baking pans.
  10. Brush tops with egg yolk.
  11. Cover and let rise until double, about an hour.
  12. Preheat oven to 400°F.
  13. Bake loaves 25-30 minutes or muffins 20 minutes until tops are golden.

2 Comments

Filed under 101 in 1001, food

Goodbye, 2011

2011 was a difficult year both for my family and for this blog.  If you are/were a regular reader, you noticed I wasn’t around much. I hope to change that this year.  Because I didn’t write many posts last year, I wasn’t surprised that most of the top posts last year were older posts.

As a farewell to the year gone by I present:

The Top Five Posts of 2011

  1. Brined Pork Roast
  2. Homemade Fabric Softener
  3. Homemade Laundry Detergent
  4. Building A Rabbit Hutch
  5. Crusty Round Loaves of Homemade Bread

I am surprised that the Brined Pork Roast recipe was number one. Especially because in my opinion, this recipe is much tastier.

I get lots of searches for green cleaning recipes. Pinterest has been especially helpful in promoting them. I’m glad people are being greener and I’ll try to post some more green cleaning recipes this year.

I am excited to see the rabbit hutch plans make the list.  I wonder if that is because more people are interested in rabbits for meat, or if pet owners just need plans? Regardless, I hope to post more rabbit updates soon. Until then, if you’re looking for rabbit information, check out On Breeding Like Rabbits.

Happy New Year,

Angela

Leave a comment

Filed under Charcutepalooza, food, frugality, green cleaning, green living, meat rabbits, Miscellaneous

Goodbye 2010, Hello 2011

The start of a new year is always a time for reflection on the past, and hope for the opportunities yet to come.  This year my family starts with some setbacks, but I am optimistic that the future will be bright despite the hurdles before us.

Although this blog was “born” in 2009, last year was my first full year blogging.  Sometimes I did a better job than others.  Posting regularly was a challenge for me at times but I hope to have a better go of it this year.  I’m not going to resolve to post daily or even weekly, but I think that posting more frequently is a good goal, as ambiguous as it is.  Challenges like the Spice Rack Challenge with its required monthly posts and the Dark Days Challenge with bi-monthly posts until April will help me stay motivated, but so will various things on my 101 in 1001 list (which I fully intend to complete).

But, as a farewell to the year gone by I present:

The Top Ten Posts of 2010

  1. Homemade Fabric Softener
  2. 28 Day Challenge Final Results
  3. June Can Jam~ Herbed Strawberry-Balsamic Jam
  4. Crusty Round Loaves of Homemade Bread
  5. How I Made Homemade Soap (and Didn’t Screw it up)
  6. Lavender’s Blue . . . (April Can Jam)
  7. How to Make Your Own Soap (Concluded)
  8. Homemade Laundry Detergent
  9. Everything but Apple Jacks?
  10. Can Jam Challenge Round Three ~ Jerked Onion

I was surprised that some of the posts made the list, but in general I wasn’t.  This blog is (mostly) about me getting back to slower times, cooking and cleaning in a way that is more sustainable.  So I shouldn’t be surprised that most of the posts on the list are in that vein: recipes for homemade food, instructions for preserving your harvests and recipes for cleaning in a more gentle manner. 

And, I was glad to see my three favorite canning recipes make the list!

Happy New Year,

Angela

Leave a comment

Filed under canning, food, green living, Miscellaneous

Happy Birthday Gwen


Hope she made a good wish.

Gwen on her fourteenth birthday.


The arrival of my daughter, Gwendolyn, fourteen years ago today was a surprise; she was five weeks early.  She was ready for the world despite everyone else’s schedules and is the same way now; she wants to do what she wants to do when she wants to do it.

Life with a teenager is different.  I could spend hours telling you of our adventures through life but as you probably are already aware, everything a mother does embarrasses a teen; she wouldn’t approve.  So, instead of telling you all the wonderful and not-so-wonderful moments we’ve shared over the years I’ll share the birthday dinner.  It will still earn me rolled eyes but it’s been awhile since I’ve done a food post.

Gwen has been a vegetarian for over three years now.  There was a short stint in the middle when I could get her to eat locally raised and sustainably produced meats but she’s since reverted to her diet of cheese and bread.  Actually, she eats fish and eggs and dairy.  She’ll even eat a lot of vegetables, but when I start combining them into balanced vegetarian meals she turns up her nose. (Ratatouille anyone?)  Since both the boys in our house are devoted carnivores, it makes dinner interesting to say the least.  Generally what happens is that the boys get a protein with a vegetable and grain or potatoes on their plates and Gwen gets the same plate without the meat.  She doesn’t particularly enjoy soy-based meat replacements and I’m not sure I agree with them anyway given how unsustainable they really are.

But, it is her birthday.  Did I mention neither of the boys like fish?  So, in addition to cake I got to make not one, but two dinners today.
Let’s start with the common elements.  

Grilled corn and flatbread

Folded flatbread with an ear of corn grilled in its husk.


Everyone had an ear of grilled corn from Olds Farm and a grilled flatbread.  Leave your corn in its husk and soak it in water for an hour or two before you throw it on the grill.  I made grilled breads a lot last summer but since I’ve started using spelt or whole wheat flour, they’ve waned in popularity and nobody cheers when I cook them anymore.  I’ve been tweaking the recipe trying to find a balance of white and whole grain flour that everyone will eat; these were pretty good and nobody complained although I probably could have increased the white flour a little more.  The recipe is below.

Garden fresh Ceviche

Halibut Ceviche with veggies from our garden.


Gwen’s entrée was ceviche.  I’ve never made a ceviche before but I was very pleased with the results and will definitely be making it again.  Every time I grill fish Gwen asks, “Do we have anymore lemon?” so “cooking” the fish in the lemon seemed like a natural thing to do.

Grilled Dinner

I want my baby back, baby back.


The boys had baby back ribs.  We ordered a half a pig from Olds Farm this year.  It was processed last week and we picked it up on Wednesday.  It feels really good to have a freezer full of good, local meat but at the rate we’re eating it, I’m not sure it will last long.

Sneaky Cake with chocolate chip ice cream

Nobody will ever guess the secret ingredients.


I should have made homemade ice cream to go in Gwen’s ice cream cake but since I was already cooking two separate dinners and baking a cake in a 90 degree house, I cheated and bought some. 

Everything was a hit (even the sneaky cake) and Gwen had a great birthday.   Here are the recipes:
Grilled Flatbreads

2 1/2 tsp yeast
1 cup warm whey (or water if you haven’t made cheese recently)
1 1/2 tsp sugar
3 T. olive oil
1 1/2 tsp. salt
1 1/2 cups sifted whole wheat flour
1 3/4 cups white flour plus more for dusting

  1. Combine yeast with whey or water and sugar and let stand about 10 minutes.
  2. Stir in oil, salt and flours to form a dough that comes away from the sides of the bowl; add more flour as necessary.
  3. Knead the dough with your KitchenAid mixer until the motor dies or the dough is smooth and elastic, whichever comes first. (My mixer died at just about the same time the dough was ready so I guess I got lucky there.)
  4. Oil a large bowl, place the dough in the bowl and drizzle the top with oil.  Cover with a damp towel or cloth napkin and let rise until double.
  5. Punch the dough down and roll it into a two-inch cylinder.  Cut the cylinder into 8 pieces.  Roll each piece into a ball and keep covered with a damp towel.
  6. Preheat the grill to high.
  7. Roll each dough ball into a thin disc about 8″ in diameter.
  8. Drizzle each disc with oil and sprinkle with salt before placing onto the hot grill.  Flip when the breads bubble and the bottoms brown nicely and cook until the other side has browned.


Birthday Ceviche

About 2 lbs. Halibut from Alaskan Premium Seafoods cut into 1/2″ chunks
1/2 cup lime juice
two small onions pulled from the garden along with some of the greens finely chopped
a medium yellow and two small Roma tomatoes pulled from the garden and chopped
two small hot peppers pulled from the rainbow pepper plant minced
several lime basil leaves finely chopped
2 tsp. salt

Combine all ingredients in a non-reactive bowl.  Stir gently to blend and place in refrigerator.  Stir again every hour or so to ensure all parts of fish come into contact with the lime juice.  The fish is ready when it turns from translucent to opaque.

Scoop into bowls with a slotted spoon to remove most of the juice and serve.
Ribs

There isn’t really a recipe for my ribs.  I had the oven on for the cake so I rubbed the ribs on both sides with salt, pepper and garlic and dumped them in a glass baking dish.  I poured half a beer in the pan, covered it with foil and threw it in the oven while I prepared and baked the cake.  When the cake was done I left the ribs in while the oven cooled and then finished them on the grill with the corn and the flatbreads.  My sauce is also very complex:

  1. Dump the drippings and beer from the ribs into a sauce pan.
  2. Add a liberal amount of brown sugar and a big squirt of ketchup.
  3. Boil until desired consistency is reached.


Birthday Ice Cream Cake

1 quart ice cream
1 1/2 cups purple puree*
1 stick butter
2/3 cup chocolate chips
2 eggs
1 T. vanilla
1 C. sugar
2 C. whole wheat flour
1/4 cup cocoa powder
1 T. baking powder
1 tsp. salt
Chocolate frosting *

* Purple Puree is something the Sneaky Chef does, but mine is a little different.  Last summer, in an effort to use all the kale I was getting from my CSA, I decided to use purple kale to make a puree to add to my cakes.  It’s a little coarser than I think a spinach puree would be, but I haven’t had any complaints.  
In a saucepan, heat 1/4 cup water to boiling.  Chop a large bunch of purple kale (3-4 cups chopped) and add it to the boiling water.  When the kale is thoroughly cooked, add it and the water to your blender or food processor with two cups of blueberries and a teaspoon of lemon juice.  Puree the mixture on high-speed until it reaches a smooth consistency.  This will make over 2 cups of puree; you can freeze any extra.

Before mixing your cake, remove your ice cream from the freezer to soften (unless you just made your own and it is already soft) and line a 9 inch cake pan with plastic wrap.  Scoop ice cream into the lined pan and smooth it down so that it takes the shape of the pan.  Place the pan in the freezer to allow the ice cream to harden.

Preheat oven to 340 degrees.

  1. Melt a stick of butter with the chocolate chips in a large, microwaveable bowl.  I used milk chocolate chips because I had them on hand,  but I would advise semi-sweet for a more chocolatey cake.  Stir the chips and butter until blended.
  2. Add 1 1/2 cups purple puree, vanilla, sugar and eggs and mix well.
  3. In a medium-sized bowl combine flour, cocoa powder, baking powder and salt.  Mix until blended.
  4. Combine wet and dry ingredients into the larger bowland mix until combined.
  5. Grease two 9″ cake pans.
  6. Divide batter evenly between pans and bake for 25 minutes.
  7. Allow cakes to fully cool before assembling the ice cream tower. 
  8. Invert one cooled layer cake on a large plate.
  9. Remove plastic wrap from ice cream and stack onto cake.
  10. Top ice cream with second cake layer.
  11. Frost with Chocolate frosting *
  12. Place cake in freezer until ready to serve.

Chocolate Frosting

1 stick room temperature butter
powdered sugar and cocoa powder in a ratio of about 4:1
splash of vanilla

  1. Dump softened butter into medium-sized bowl.
  2. Add 1/4 C. powdered sugar and a T. of cocoa powder.  Stir until mixed.
  3. Add a splash of vanilla and stir again.
  4. Continue adding cocoa  and sugar until the frosting reaches a workable consistency. 

This post has been added to the Family Food Fridays bloghop.  Check it out for a selection of delicious recipes!

2 Comments

Filed under food

Spring CSA Update

So, you’ve signed up for a CSA.  You’re excited because you know the local produce you’re going to pull out of the box is the freshest produce you can get.  You also know that you’re saving money because even though you’re paying $20-$30 a week for your share, you’re actually getting a lot of veggies for your money.  But then, you get the box home and open it up and think, “What have I gotten myself into?? I don’t even know what half this stuff is let alone how to cook with it.”  I felt that way a lot last year.  I ended up making lots of salads.  So far this spring I’m still getting a lot of “salad greens” but there have been plenty of other goodies as well.  

Let’s start with week two:   

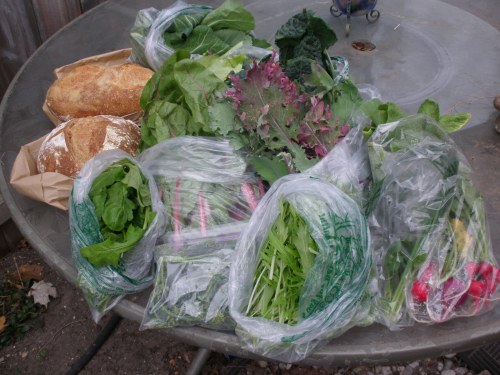
Week 2 Spring Cream of the Crop Share

Week 2 of my 9 Bean Rows Cream of the Crop Share.

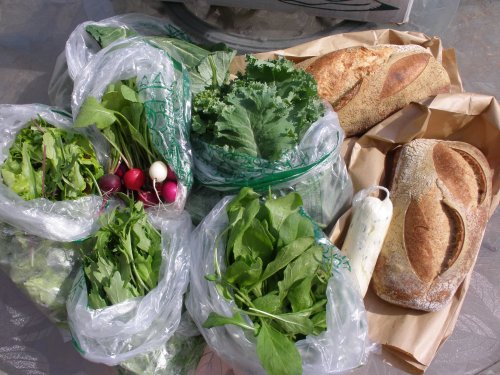
This is the whole share.  Stephanie gets half of it, but a half  has worked out really well so far.  This box had collards, Red Russian Kale, blue kale, Easter Egg Radishes, Mizuna, Kaleini, chives, oregano, Ruby Red Chard, Arugula and two loaves of bread.   

So, as I mentioned before, it’s a really “salad-y” share.  Mizuna and Arugula are both peppery lettuce varieties, and radishes are primarily a salad vegetable.  However, a quick Internet search revealed 10 Tasty Radish Recipes including one for radish chips.  I think I’ll have to try that one out.  My husband, once a chef, has always been perplexed by radishes.  Cooking them generally turns them to mush and blanches most of the flavor out.  Chips might work.   

Once the salad vegetables have been eliminated, we’re left with herbs, cooking greens and Kaleini.  Kaleini is an invention of Nic’s.  I’m pretty sure it’s not a hybrid but the young flowers from kale plants, but I couldn’t guarantee that.  Sautéed with butter and garlic, it was delicious and reminiscent of Broccoli Raab or broccolini.  

I gave all the herbs to Stephanie because I grow both chives and Oregano.  It seems silly for me to split them when I have a whole yard full of herbs including so much Oregano that I generally pull it out like weeds and compost it.   

Chard can be sautéed like spinach or used in most cooked spinach recipes.  I ate some sauteed in roast pork tenderloin drippings for dinner tonight.  I haven’t tried it yet because I am not a huge fan of eggs, but Barbara Kingsolver has a recipe on her Animal Vegetable Miracle website for Eggs in a Nest.  

Although I like it, kale is something I still haven’t figured out.  I can never seem to eat it all even though we are splitting a share.  Fortunately it lasts a while. Unfortunately as soon as I think I’ve eaten it all, I get a fresh supply.  So I will admit that I have fed kale to my chicken.  But, there really are lots of things you can do with kale.  You can find (literally) millions of recipes for kale chips on the Internet.  You can add kale to smoothies.  You can chop kale and add it to soups or stews.  I’ve even steamed it, ground it up and added it to chocolate cakes without being discovered by my family.  Those cakes were the most moist, delicious cakes you could imagine.  To my daughter’s great disgust I added chopped kale to curried garbanzo beans.  First she whined.  Then she begged to pick the kale out.  Then, she came back for seconds.  

 Collard greens are delicious, but so far I’m the only one in my house that will eat them.  I thought for sure Mr. Hippie would like them cooked in bacon, but he wanted them to be saltier.  Next time I think I would add garlic to the end sauté.

Collard Greens and Black-Eyed Peas 

Medium-sized bunch of collards
2-3 slices bacon
1 1/2 cups black-eyed peas, soaked overnight 

  • Boil black-eyed peas in seasoned water 60 -90 minutes.  (I added salt, pepper and minced garlic.)   
  • While peas are cooking, cut stems out of collard greens and feed to your chickens (or compost if you don’t have any chickens yet).  Once the stems have been removed, chop the collards into 1/2″ strips and add to boiling salted water.  Cook for about  30 minutes.
  • Meanwhile, cook bacon in a very large skillet and let cool on a paper towel.  Reserve 1-2 Tablespoons of bacon fat but pour most of it into your fat jar to make soap with later.  Or, if you want to make your dog really happy, drizzle it over his kibble or add it to homemade dog food or biscuits
  • Once the bacon has cooled, chop it into bits and return it to the pan with the bacon fat you saved.
  • Drain the collards and the black-eyed peas and add them to the skillet with the bacon bits and fat.  Sauté until heated through and season to taste. 

In addition to the veggies and greens there was, of course, freshly-baked bread.  Yum.  Mostly we just slice it and eat it with butter, but sometimes I toast it or make French Toast.  French Toast is really delicious with Jen’s bread. 

Week three looked very similar, but included some new items.  

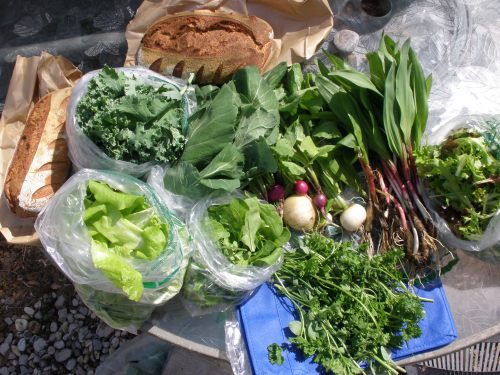
Week Three Cream of the Crop Share
My week three Cream of the Crop share from 9 Bean Rows.

Homemade bread is a given although the loaves were oblong rather than the roundish loaves we got the second week.  More kale, more collard greens, more radishes and Arugula.  Mixed salad greens made a comeback this week which is great; I’ve been eating salad for lunch most days.  This week’s  herbs were chives, Oregano,  tarragon and parsley.  I kept some of the parsley because I don’t have any growing, but gave the rest of the herbs to Stephanie again.  I’ve never grown parsley because I’ve never been a fan of it.  That all changed last year when I started getting it in my CSA box from Providence Farm.  I started making tabbouleh and now I’m addicted to the stuff so I’ll definitely be planting some parsley this year.

New this week were ramps or wild leeks.  When I got these ramps, I wasn’t sure what I’d do with them.  I usually harvest some from the woods when I’m foraging for morels, but never this many at a time.  Then I found this post about wild leeks and thought hmm. . . pickling them would be fun.  I think maybe I’ll use my jerked onion recipe from last month’s Can Jam challenge.  But then, Stephanie said that she was using her leeks in fajitas.  What a great idea!!  I cleaned up the leeks, cut the bulbuous white part off and saved them for canning and cut up some of the leafy parts to use in my fajitas.  You can chop the leeks up into salads with the rest of your early spring salad greens.  I just had an inspiration!  My grandma makes “ham roll-ups” at Christmas time.  I think a leek would work in lieu of a scallion:  Lay a thinly sliced piece of ham on a plate.  Spread the ham with cream cheese.  Place the leek along one edge of the ham slice and roll it up.  Cut the ham cylinder into one inch spirals.  I never eat them except at parties, but even if I pickle the bulbs of my leeks I’ll have a lot of greens leftover.  I think even my son would eat the leeks in roll-ups.
This week I couldn’t pick up the share because I was at the Family Wisdom Conference ALL DAY on Saturday.  It was great, but exhausting.  So, since I couldn’t make it to the market, Stephanie picked up the box and split it for me.  Since Stephanie already split the produce, this is only my half of the share. 

9 Bean Rows CSA Share Week 4
My half of the 9 Bean Rows CSA Share from week 4.

First, let me say that Jen’s Brioche was so delicious that I started eating it before I remembered to take a picture.  My husband loved it so much that I’m afraid he’ll never eat regular bread again.  I’ve already researched brioche recipes.  As soon as I figure out which one is the best, I’ll do a post so you can share in the bliss.  (Or, head on over to the Mercato next week and buy a loaf or six.)

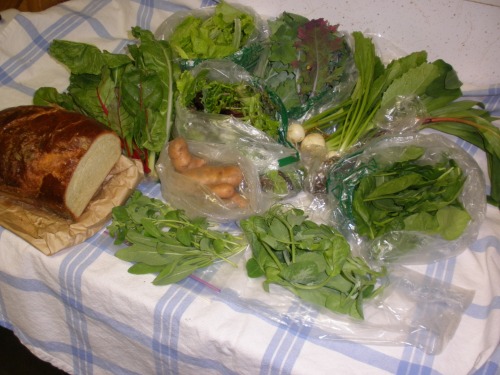
In addition to the brioche I found more chard, more leaf lettuce, more salad greens, more kale, more ramps, sage and oregano.  However, I also got the first turnips of the season.  I’ve never cooked mine, but they can be cooked like potatoes and added to soups.  I add turnips to salads with the rest of my salad-y vegetables.  I also found the first spinach of the season (yay!), baby potatoes and peas shoots. 
I don’t eat spinach raw.  I almost always saute it or throw it in the pan when I’ve finished cooking the meat until it wilts in all the delicious drippings.  I like the taste of raw spinach, but there is something about the way it feels on my teeth that I just can’t handle.  Potatoes are pretty easy.  I still have 20ish pounds of Russets in storage, but my Yukons and Redskins are on their way out (in both quantity and quality).  I like new potatoes like these boiled then tossed in yogurt with salt, pepper, garlic and fresh chives or dill (or, minced ramp leaves if that’s what you have around). 
Pea shoots can be chopped into salads, but I’m thinking of adding them to a stir fry at the very end instead of pea pods.
What do you do with your CSA Share?  I’d love to hear your ideas!

5 Comments

Filed under food

To CSA or Not to CSA?

When I first started “blogging”, I wasn’t actually blogging.  I was using the ‘Notes’ tab on Facebook to journal.  I started out with weekly updates of my CSA share from Providence Farms and included recipes and anecdotes.  Partly it was a way for me to share with friends what I was doing, but in the back of my mind I was writing a book and I needed a place to keep notes that could be eventually incorporated into my book.  My book dream hasn’t died, but the Master Plan has evolved along the way.  So have the notes. 

The notes are now this blog and it is so much more than a diary of my CSA share.  In fact, because I didn’t sign up for a winter CSA share I haven’t blogged about a CSA much at all.  Why didn’t I sign up?  First of all, Providence didn’t offer a winter share.  Second, I had convinced myself that I wasn’t going to do a CSA share because I would be growing more of my own veggies this year.  I still plan to grow more veggies, but in the past I haven’t had a lot of luck in my garden.  I’m hoping that I can remedy that this year, but I’m nervous about doing it all on my own.  Plus, at the moment I don’t have a greenhouse, or a hoophouse, or even a cold frame.  I have a plastic seed-starting tray.  This limits the winter and spring growing I can do.

I started seeds two weeks ago, but so far only the onions and cauliflower have sprouted; old seeds will do that to you.  I’ll purchase some fresh seeds and try again, but crop failure is always a risk when you are a farmer or a gardener or even an urban homesteader which I think is what I’m aiming to be at the moment. 

When a friend asked if I wanted to split a CSA share, I hesitated.  Then I did a little research and decided to go for it.  We started a share with 9 Bean Rows Saturday morning.  We decided on 9 Bean Rows for a few reasons. 

First, their timing was perfect.  Instead of offering “summer” shares starting in June and running through October ike most the CSAs around here do, they offer four sessions that start and end with the changing of the seasons.  Since we just celebrated the Vernal Equinox, Stephanie and I were just in time for a spring share. 

Beacuase the sessions are shorter than most CSA shares, the initial expense is less too.  Most CSA shares run $450-$500 for the season.  At $350 for 12 weeks, the weekly cost works out to be about the same as the longer shares only in a smaller dose.  Plus, they let us pay in four installments; I’m paying two, Stephanie’s paying two.  It hurts less that way. 🙂 

Another nice thing about 9 Bean Rows is that they offer three different tiers of shares.  The Herbivore share is for salad lovers.  Each week you receive a variety of greens, herbs and edible flowers to make interesting salads year-round.  Tastes of the Garden is the basic share.  It is probably the best value and if I do a summer share, I might downgrade to this share. It has whatever is in season picked fresh each week.  The Cream of the Crop share that I’m splitting with Stephanie is the “premium” share.  Each week you get the basic share plus a loaf of bread, a dozen eggs and frequent “value added” products.  These could be wine from Blackstar Farms, jams and jellies in their season, morel mushrooms, syrup or herb butters like the chive butter tucked into my share this week.  My logic on springing for this share may be twisted, but here it is:  It’s spring.  Not a lot of things are growing yet.  As they start to come into season, the Cream of the Crop shareholders will get the first of those newly emerging products.  That means that as rhubarb, asparagus, wild leeks and even morels start poking their heads up from the cold earth, (Stephanie &) I’ll be the first to enjoy them.  We’ll also get more of these goodies than the standard shareholders and as the season runs out on these goodies, we’ll get the end of the run too.  When pickin’s are slim it seems worth the extra investment.

You’re probably wondering why I’d pay extra for a share that offers eggs when I’m harvesting my own now.  Well, I’m not.  Stephanie and I both have chickens and didn’t want the eggs, so the folks at 9 Bean Rows swapped out the eggs for an extra loaf of bread each week.  This is perfect for us because now we each get a loaf every week instead of splitting a loaf.  It’s actually a better value for us too, because even when I was buying eggs, I was paying less for a dozen local eggs than they charge for a loaf of their delicious bread.  I bake a lot of my own bread, but it’s nice to change things up once in awhile. 

And, the last reason I decided to go with 9 Bean Rows this season?  Well, you may remember that I’m on the Family Wisdom planning comittee this year.  Jen from 9 Bean Rows is speaking at the conference this year.  She’s agreed to do a session on how to cook from your CSA share or from what’s in season at the Farmers’ Market.  It seemed like the right thing to do.  You know, “You scratch my back, I’ll scratch yours.” 

Our share was short a couple things this week because I signed up at the very last minute and they had already harvested and sorted everything, but Jen said she’d catch us up next week.  So, if you need one more reason to try a CSA, here it is:

9 Bean Rows Cream of the Crop

My Cream of the Crop share: Spring Week 1

4 Comments

Filed under Uncategorized

Dark Days Week 19

Well, the true “Dark Days” are officially over with the arrival of spring, but the other challenge participants and I are playing along for the rest of the month.  This week I made one of my husband’s favorites, a modified Shepherd’s Pie. 

 I had loads of local onion leaves left from processing all the onions for the Can Jam challenge last week, so I started by chopping the scallion-y leaves  into a skillet with a drizzle of olive oil.  I added a couple of cloves of crushed garlic from Providence Farms, a pound of ground beef from Olds’ Farm, a little salt & pepper and sauteed the whole mixture until the meat was cooked through.

Meanwhile in a pot of boiling salted water, I cooked four or five redskin potatoes from Westmaas Farms.  When the potatoes were cooked fully I mashed them, skins and all, with some homemade feta cheese

Drain the extra fat from the cooked ground beef.  Scoop the feta-mashed potatoes out of their pan and spread them onto the beef.  To make the whole mess extra tasty, grate some Black Star Farms Raclette on top before baking.  Everything is fully cooked so you only need to bake the pie long enough for it to become golden and delicious.  Or, you can preassemble pies and bake them another day when you need a quick meal and don’t have time to cook.

Meat and potato pie

Fresh from the oven.

I love this dinner because it is simple, I almost always have all the ingredients I need for it in the house, and everyone in the family will eat some variation of it.  Sometimes I add corn kernels or other veggies to the ground beef, but it is good without them. 

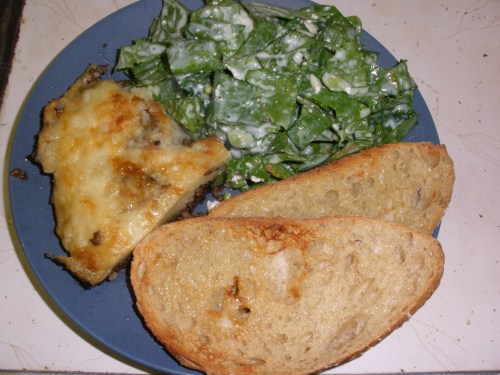
To round out our meal I made a salad with local romaine lettuce, more onion greens and the yogurt-feta dressing I made last week but didn’t eat because I was out of lettuce. 

Last Saturday was “Shop Your Community Day” so while I was wandering around the Commons after my trip to the Farmers’ Market, I popped in to Pleasanton Bread and picked up a loaf of their wood-fired brick oven whole wheat bread.  It was delicious toasted with this simple meal.

Quick & Delicious Dinner

A wintry meal for a spring day.

4 Comments

Filed under Dark Days, food